As summer approaches, the quest for the perfect refreshing treat begins. One delicious option that has gained immense popularity over the years is the humble popsicle. These frozen delights come in various flavors and formats, making them a staple of sunny days and backyard barbecues. Among the myriad of popsicle recipes available, the Tropical Watermelon Bliss Pops stand out with their vibrant colors, tropical flavors, and healthful ingredients. This recipe not only embodies the essence of summer but also offers a guilt-free way to cool down during those sweltering afternoons.
The Tropical Watermelon Bliss Pops are a delightful combination of juicy watermelon, creamy banana, hydrating coconut water, and a splash of zesty lime juice. These ingredients come together to create a popsicle that is not just delicious but also packed with nutritional benefits. Watermelon, often referred to as nature’s candy, is known for its high water content and refreshing properties. Meanwhile, bananas contribute natural sweetness and creaminess, while coconut water provides essential electrolytes. The addition of lime juice not only brightens the flavor profile but also offers a range of health benefits.
In the following sections, we will delve deeper into the ingredients that make these pops a standout treat and guide you through the essential steps to create your very own Tropical Watermelon Bliss Pops.
Understanding the Ingredients
Overview of Watermelon
Watermelon is the star of this popsicle recipe, and for good reason. This juicy fruit is not only delicious but also incredibly hydrating, making it a perfect summer snack. Comprising about 92% water, watermelon is an excellent choice for staying hydrated on hot summer days. Beyond its refreshing qualities, watermelon is low in calories and packed with vitamins A and C, which are essential for maintaining healthy skin and boosting the immune system.
Moreover, watermelon contains antioxidants such as lycopene, which has been linked to various health benefits, including reduced risk of certain types of cancer and heart disease. Its natural sweetness makes it an ideal base for popsicles, providing a flavorful treat without the need for excessive added sugars. It’s easy to see why watermelon is celebrated as a summer favorite, and incorporating it into popsicles is a delicious way to enjoy its benefits.
Exploring the Banana
The addition of banana to the Tropical Watermelon Bliss Pops introduces a creamy texture and a natural sweetness that enhances the overall flavor. Bananas are not just tasty; they are also highly nutritious. They are rich in potassium, which is crucial for heart health and maintaining proper muscle function. Additionally, bananas contain vitamin B6, fiber, and a variety of antioxidants.
From a culinary perspective, bananas serve an essential role in achieving the perfect popsicle consistency. When blended, they create a creamy base that helps the popsicles hold their shape while still being easy to bite into once frozen. Their natural sweetness can also reduce the need for additional sweeteners, making these pops a healthier treat.
Benefits of Coconut Water
Coconut water has gained recognition as a superhydrator, making it another key ingredient in our Tropical Watermelon Bliss Pops. It is a natural source of electrolytes, including potassium, sodium, and magnesium, which are vital for maintaining fluid balance in the body, especially during hot weather or after exercise. Compared to regular water, coconut water provides a refreshing and nutrient-rich alternative for hydration.
Including coconut water in your popsicle recipe not only enhances the flavor but also offers additional health benefits. It can help replenish electrolytes lost during sweating, making these pops a great post-workout treat or a refreshing snack on a hot day. Plus, its subtle sweetness adds to the overall flavor profile without overpowering the natural taste of the watermelon and banana.
The Role of Lime Juice
Lime juice is the secret ingredient that ties all the flavors together in the Tropical Watermelon Bliss Pops. It adds a bright, zesty kick that balances the sweetness of the fruit and enhances the overall flavor profile. Lime juice is also rich in vitamin C, which supports immune function, skin health, and acts as an antioxidant.
In addition to its flavor-enhancing qualities, lime juice serves a functional role in the recipe. The acidity in lime juice can help prevent the oxidation of the fruits, ensuring that your pops maintain their vibrant color and fresh taste. Using lime juice in moderation can elevate your popsicles from ordinary to extraordinary, making each bite a refreshing experience.
Sweeteners: Honey vs. Agave Syrup
While the natural sweetness from watermelon and banana is often sufficient, you may want to adjust the sweetness of your Tropical Watermelon Bliss Pops to suit your taste. Two popular natural sweetening options are honey and agave syrup. Both of these sweeteners offer unique benefits and can complement the flavors of the pops.
Honey is a natural sweetener with antimicrobial properties and a distinct flavor that can enhance the overall profile of your pops. However, it is important to note that honey is not suitable for vegans. On the other hand, agave syrup is a vegan-friendly alternative that is sweeter than honey, allowing you to use less to achieve the desired level of sweetness.
When adjusting the sweetness levels in your popsicle mixture, start with a small amount of your chosen sweetener and gradually add more to taste. This approach allows you to customize the flavor to your preference and ensures that the natural fruit flavors remain the star of the show.
Step-by-Step Guide to Making Tropical Watermelon Bliss Pops
Now that we’ve explored the ingredients that make these pops so delightful, it’s time to dive into the step-by-step process of making your own Tropical Watermelon Bliss Pops. Following these clear instructions will help you achieve the perfect consistency and flavor balance, ensuring a successful and enjoyable popsicle-making experience.
Blending the Base
To start, you will need to gather all your ingredients: fresh watermelon, ripe bananas, coconut water, lime juice, and your choice of sweetener. Begin by cutting the watermelon into manageable chunks, removing any seeds or rind. This will make blending easier and ensure a smooth popsicle base.
1. Prepare the Watermelon: Place the watermelon chunks in a blender. Depending on the size of your blender, you may need to work in batches. Aim for about 2 cups of watermelon.
2. Add the Banana: Next, peel and slice one ripe banana, adding it to the blender. The banana will contribute creaminess and sweetness to the pops.
3. Incorporate Coconut Water: Pour in approximately 1 cup of coconut water. Adjust this amount based on your desired consistency; more coconut water will yield a thinner mixture, while less will create a thicker base.
4. Squeeze in Lime Juice: Add the juice of one lime to the blender. This will brighten the flavor of the pops and enhance the overall taste.
5. Sweeten to Taste: If you prefer a sweeter popsicle, add a tablespoon of honey or agave syrup at this stage. Remember, you can always add more later, so start with a smaller amount.
6. Blend Until Smooth: Blend all the ingredients on high speed until you achieve a smooth and creamy consistency. Stop occasionally to scrape down the sides of the blender to ensure everything is well combined. The mixture should be thick yet pourable, reminiscent of a smoothie.
Tips on Achieving the Right Balance of Flavors
Taste-testing your popsicle mixture before freezing is crucial. Take a small spoonful of the blended mixture and assess the flavors. If you find it needs more sweetness, add a little more of your chosen sweetener and blend again. If the mixture is too sweet, a splash more lime juice can help balance it out. Achieving the perfect flavor balance is key to creating popsicles that will be a hit with family and friends.
Taste Testing and Adjustments
Once you are satisfied with the flavor of your mixture, it’s time to prepare for freezing. Pour the blended mixture into popsicle molds, leaving a little space at the top for expansion as they freeze. Insert sticks into the molds and place them in the freezer.
To ensure even freezing, it’s best to leave the popsicles in the freezer for at least 4-6 hours or until they are completely solid. During this time, you can plan your next summer gathering, knowing that you will have a refreshing treat ready to impress your guests.
Modifying Flavors Based on Personal Preference
Feel free to get creative with your Tropical Watermelon Bliss Pops! You can add additional fruits such as strawberries, pineapple, or mango to the mixture for a unique twist. Just be mindful of the overall flavor balance, and adjust the sweetness and acidity accordingly. The beauty of homemade popsicles is that they can be tailored to suit your taste preferences, so don’t hesitate to experiment!
Stay tuned for the next part, where we will explore additional tips for preparing and enjoying these delightful summer treats, as well as answer some common questions about popsicle-making.
{{image_2}}
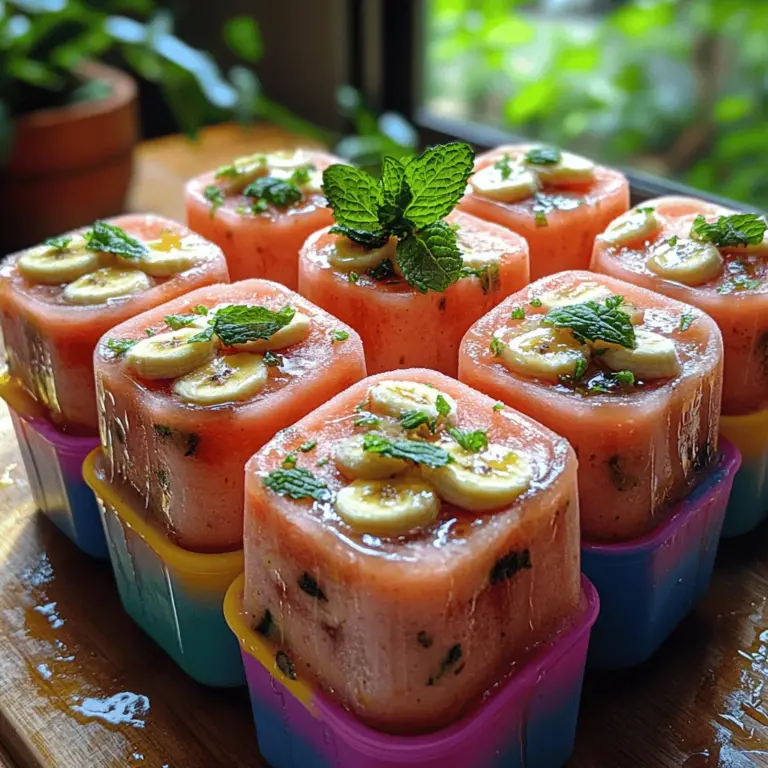
Preparing Your Molds
The first step in making your Tropical Watermelon Bliss Pops is preparing your molds. Choosing the right popsicle molds is essential for achieving the perfect shape and ease of removal. Silicone molds are highly recommended due to their flexibility, which makes it easy to pop out the finished product without damaging it. Alternatively, plastic molds can work well, but ensure they are designed for popsicles and not just ice cubes.
Best Practices for Filling Molds Without Spilling
When filling your molds, take care to avoid spills that can make a mess. Here are some effective tips:
1. Use a Funnel: A funnel can be incredibly helpful for pouring the mixture into narrow molds. This will reduce the chances of spills and help with precision.
2. Pour Slowly: Fill the molds slowly and steadily. If you notice any bubbles forming, gently tap the mold on the counter to release them before it overflows.
3. Leave Space for Expansion: Remember that liquid expands as it freezes. Leave a small gap at the top of each mold to accommodate this expansion, generally about 1/2 inch from the top.
Recommendations for Different Types of Molds
There are various types of popsicle molds available, and each has its advantages:
– Silicone Molds: These are flexible and easy to clean, allowing for effortless removal of pops. They come in various shapes and sizes, making them fun for kids and adults alike.
– Plastic Molds: Traditional plastic molds are often more rigid but are usually designed with easy-release mechanisms. Look for molds with a built-in stick holder to keep your pops stable while freezing.
– Ice Cube Trays: If you don’t have traditional molds, use ice cube trays. Just insert sticks after the mixture has been in the freezer for about an hour, when it’s slushy but not completely frozen.
Inserting Sticks
Once your molds are filled, the next step is to insert the sticks. This is a crucial part of the process, as the sticks are what allow you to hold and enjoy the pops.
Discussing the Necessity of Sticks and Alternatives
Popsicle sticks are essential for the traditional popsicle experience, providing a handle for easy eating. Wooden sticks are the most common choice, but if you prefer an eco-friendly option, consider using bamboo or reusable silicone sticks.
If you want to get creative, you can also use fruit slices or even candy sticks as alternatives for a fun twist. Just ensure that whatever you use is sturdy enough to support the weight of the popsicle.
Freezing Process
Now that your molds are filled and sticks are in place, it’s time to freeze your Tropical Watermelon Bliss Pops.
Best Practices for Freezing to Ensure Optimal Texture
To achieve the best texture in your popsicles, follow these guidelines:
1. Freeze for a Minimum of 4-6 Hours: Allow your pops to freeze solidly for at least 4 to 6 hours. If possible, overnight is ideal to ensure they are fully set.
2. Avoid Temperature Fluctuations: Keep the freezer at a consistent temperature to avoid ice crystals forming, which can make your pops icy rather than creamy.
3. Cover the Molds: If your freezer has strong odors, consider covering the molds with plastic wrap to prevent the pops from absorbing any unwanted smells.
What to Expect During the Freezing Process
As your pops freeze, you may notice that the liquid expands slightly. It’s normal for the tops to rise above the mold, so don’t be alarmed. After a few hours, check the firmness by gently poking one of the pops with a stick. If it feels solid, they’re ready for the next step.
Unmolding and Serving
Once fully frozen, it’s time to enjoy your Tropical Watermelon Bliss Pops. However, unmolding can sometimes be tricky.
Techniques for Easy Release of Pops from Molds
To release the pops easily from their molds, try these techniques:
1. Run Under Warm Water: Hold the mold under warm running water for 10-15 seconds. The warm water will help loosen the pops without melting them too much.
2. Twist Gently: If using silicone molds, gently twist the mold to release the pops. This is often effective as it helps to break the seal created by the frozen mixture.
3. Let Sit for a Minute: If they’re still stuck, let the molds sit at room temperature for a minute before attempting to remove them again. This slight thawing can help.
Creative Serving Suggestions
To present your Tropical Watermelon Bliss Pops in a delightful way, consider these ideas:
– Garnish: Serve the pops with a sprinkle of toasted coconut or a drizzle of honey for added sweetness.
– Fruit Platters: Create a colorful fruit platter with slices of fresh tropical fruits like kiwi, pineapple, and mango. Place the pops in the center for a beautiful display.
– Serving in a Glass: For a fun twist, serve your pops in a tall glass with fresh fruit slices around the rim. This adds a touch of elegance to any summer gathering.
Nutritional Information
Understanding the nutritional benefits of your Tropical Watermelon Bliss Pops is essential for enjoying them as part of a balanced diet.
Detailed Breakdown of Calories, Sugars, and Vitamins Per Pop
Each Tropical Watermelon Bliss Pop contains approximately:
– Calories: 50-60
– Sugars: 8-10g (naturally occurring from fruits)
– Vitamins: Rich in Vitamin C and A, providing immune support and skin benefits.
These pops are a guilt-free treat, allowing you to indulge in something sweet while still maintaining a healthy lifestyle.
Health Benefits of the Ingredients in the Context of a Balanced Diet
The main ingredients—watermelon and pineapple—are not only delicious but also packed with health benefits. Watermelon is hydrating and low in calories, making it perfect for hot days. Pineapple contains bromelain, an enzyme that aids digestion and reduces inflammation. Together, these fruits help to boost your immune system and provide essential vitamins your body needs.
Creative Variations on Tropical Watermelon Bliss Pops
While the original recipe for Tropical Watermelon Bliss Pops is delightful, there are numerous ways to customize them to suit your tastes.
Adding Different Fruits
Consider incorporating other tropical fruits to enhance the flavor and nutrition of your pops:
– Mango: Adds a creamy texture and sweetness.
– Passion Fruit: Provides a tart contrast that complements the sweetness of the watermelon.
– Coconut Water: Substitute part of the watermelon juice with coconut water for an extra tropical twist.
Experimenting with Flavors
Get creative with flavors by adding herbs and spices. Here are a few ideas:
– Mint: Blend fresh mint leaves into the mixture for a refreshing taste.
– Ginger: A hint of ginger can add a zesty kick to your pops.
– Lime Juice: A splash of fresh lime juice enhances the tropical vibe and increases acidity.
Vegan and Allergy-Friendly Options
For those with dietary restrictions, this recipe can easily be adapted:
– Nut-Free: Since the recipe already avoids nuts, it is safe for nut allergies.
– Dairy-Free: This recipe is naturally dairy-free, making it suitable for those with lactose intolerance or dairy allergies.
– Sweetener Substitutes: If you prefer a different sweetener, agave nectar or stevia can be used as alternatives to honey.
Seasonal and Occasion-Based Serving Suggestions
Tropical Watermelon Bliss Pops are perfect for various occasions and seasonal gatherings.
Perfect Summer Gatherings: Picnics, Barbecues, and Pool Parties
These pops are a hit at summer picnics and barbecues. Their refreshing taste is a welcome relief from the heat. Set up a popsicle station with toppings and sauces for guests to customize their pops, making it fun for everyone.
How to Present the Pops for Special Occasions
For special occasions like birthday parties or holidays, consider:
– Themed Decorations: Use tropical-themed decorations to enhance the presentation.
– Personalized Labels: Create labels for each flavor variant to guide guests.
– Colorful Displays: Arrange the pops in colorful ice buckets or trays filled with ice to keep them chilled.
Conclusion
Making Tropical Watermelon Bliss Pops is not just about creating a delicious frozen treat; it’s an experience that brings joy, creativity, and health together. With simple ingredients and straightforward steps, you can whip up these delightful pops at home and customize them to your liking.
As you prepare to indulge in these refreshing treats, remember the health benefits they offer and the fun of experimenting with different flavors and ingredients. Whether you’re enjoying them at a summer gathering or on a quiet afternoon, these pops are sure to bring a smile to your face.
So, gather your ingredients, unleash your creativity, and embark on the delightful journey of making Tropical Watermelon Bliss Pops—your taste buds will thank you!
