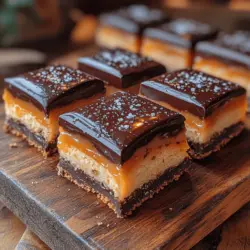
Indulging in a slice of Dreamy No-Bake Millionaire’s Shortbread is like treating yourself to a slice of pure bliss. This dessert is a delightful combination of three sumptuous layers: a buttery biscuit base, a rich caramel filling, and a smooth chocolate topping. Perfect for any occasion—whether it’s a festive gathering, a casual get-together, or simply a well-deserved treat at home—this no-bake dessert brings both elegance and ease to your table. With a straightforward preparation process and the added benefit of not needing an oven, you can whip up this decadent dessert with minimal fuss. Let’s explore the enchanting layers of Millionaire’s Shortbread and learn how to create it in the comfort of your kitchen.
Understanding the Components of Millionaire’s Shortbread
Before we dive into the step-by-step guide for crafting this delicious dessert, let’s take a closer look at its components. Understanding the role of each layer will help you appreciate the luxurious flavors and textures that come together in this treat.
Exploring the Base Layer
The foundation of any great dessert lies in its base, and in the case of Millionaire’s Shortbread, the base layer is crafted from digestive biscuits. These biscuits, known for their delightful crunch and subtle sweetness, provide the perfect backdrop for the richer components above.
To achieve the ideal base, the biscuits need to be finely crushed into crumbs. This ensures that they mix well with the melted butter and light brown sugar, creating a cohesive mixture that can be pressed firmly into the baking tin. The melted butter adds richness, while the light brown sugar contributes a hint of caramel flavor, enhancing the overall taste of the base.
When preparing the base, it’s crucial to press the mixture evenly into your baking tin. This step lays the groundwork for the layers to come, ensuring that your Millionaire’s Shortbread holds its shape when sliced. An even layer will result in a balanced dessert that has the perfect ratio of biscuit, caramel, and chocolate in every bite.
Delving into the Caramel Layer
Next up is the heart of the Millionaire’s Shortbread: the luscious caramel layer. This layer is where the dessert truly shines, and achieving the right texture is essential. The creamy caramel is made using a combination of sweetened condensed milk, butter, and golden syrup.
Sweetened condensed milk provides the base for the caramel, giving it a smooth, creamy consistency that melts in your mouth. The butter enhances the richness, while the golden syrup adds a touch of sweetness and depth to the flavor. When combined and cooked gently, these ingredients transform into a velvety caramel that contrasts beautifully with the crunchy biscuit base.
One of the keys to perfecting this layer is patience. Cooking the caramel over low to medium heat while stirring constantly helps prevent it from burning or becoming grainy. The goal is to achieve a beautifully smooth, thick caramel that can be poured over the biscuit base, setting to form a luscious layer that elevates the entire dessert.
Analyzing the Chocolate Topping
Completing this decadent dessert is the chocolate topping, which serves as the crowning glory of the Millionaire’s Shortbread. Using a combination of high-quality dark and milk chocolate creates a luxurious finish that beautifully contrasts the sweetness of the caramel and the crunch of the biscuit base.
To create the perfect chocolate topping, it’s essential to melt the chocolate gently. This can be done using a double boiler or in short bursts in the microwave to avoid overheating. The smooth, melted chocolate is then poured over the caramel layer, creating a glossy finish that is as pleasing to the eye as it is to the palate.
For an added touch of sophistication, consider sprinkling a pinch of sea salt on top of the chocolate before it sets. This enhances the flavor profile, providing a delightful contrast that elevates the sweetness of the caramel and the richness of the chocolate.
Step-by-Step Guide to Making Dreamy No-Bake Millionaire’s Shortbread
Now that we’ve explored the components that make up this sumptuous dessert, it’s time to dive into the step-by-step process of making Dreamy No-Bake Millionaire’s Shortbread. Follow these instructions carefully to ensure a successful outcome.
Crafting the Biscuit Base
1. Gather Your Ingredients: For the biscuit base, you will need:
– 200g digestive biscuits
– 100g unsalted butter, melted
– 50g light brown sugar
2. Crush the Biscuits: Start by placing the digestive biscuits in a food processor and pulse them until they are finely crushed. Alternatively, you can place them in a ziplock bag and crush them with a rolling pin if you don’t have a food processor.
3. Combine the Ingredients: In a mixing bowl, combine the crushed biscuits, melted butter, and light brown sugar. Mix until the ingredients are well combined and the crumbs are evenly coated with butter.
4. Press into the Tin: Line a square baking tin (approximately 8 inches) with parchment paper for easy removal. Pour the biscuit mixture into the lined tin and use the back of a spoon or a flat-bottomed glass to press it down firmly and evenly. This step is crucial for ensuring that the base holds together when you slice the dessert later.
5. Chill the Base: Place the tin in the refrigerator for about 30 minutes to allow the base to firm up before adding the caramel layer.
Creating the Perfect Caramel
1. Gather Your Ingredients: For the caramel layer, you will need:
– 100g unsalted butter
– 400g sweetened condensed milk
– 150g golden syrup
2. Melt the Ingredients: In a medium saucepan over low heat, combine the butter, sweetened condensed milk, and golden syrup. Stir continuously until the butter has melted and the mixture is well combined.
3. Cook the Caramel: Increase the heat to medium and continue to stir the mixture constantly. As it heats, you will notice it starting to bubble. Continue cooking for about 10-15 minutes until the caramel thickens and turns a light golden color. Be vigilant during this process and avoid leaving the caramel unattended to prevent burning.
4. Pour Over the Base: Once the caramel has reached the desired consistency, carefully pour it over the chilled biscuit base. Use a spatula to spread it evenly across the surface.
5. Chill Again: Return the tin to the refrigerator for another 30-60 minutes to allow the caramel to set before moving on to the chocolate layer.
Melting the Chocolate
1. Gather Your Ingredients: For the chocolate topping, you will need:
– 200g dark chocolate
– 100g milk chocolate
2. Melt the Chocolate: Break the dark and milk chocolate into pieces and place them in a heatproof bowl. You can melt the chocolate using a double boiler or microwave. If using the microwave, heat it in short bursts of 20-30 seconds, stirring in between, until smooth and fully melted.
3. Pour Over the Caramel: Once the chocolate is melted, carefully pour it over the set caramel layer, using a spatula to spread it evenly.
4. Add Sea Salt (Optional): If desired, sprinkle a pinch of sea salt over the melted chocolate for an added burst of flavor.
5. Final Chill: Place the tin back in the refrigerator to allow the chocolate to set completely, which usually takes around 1-2 hours.
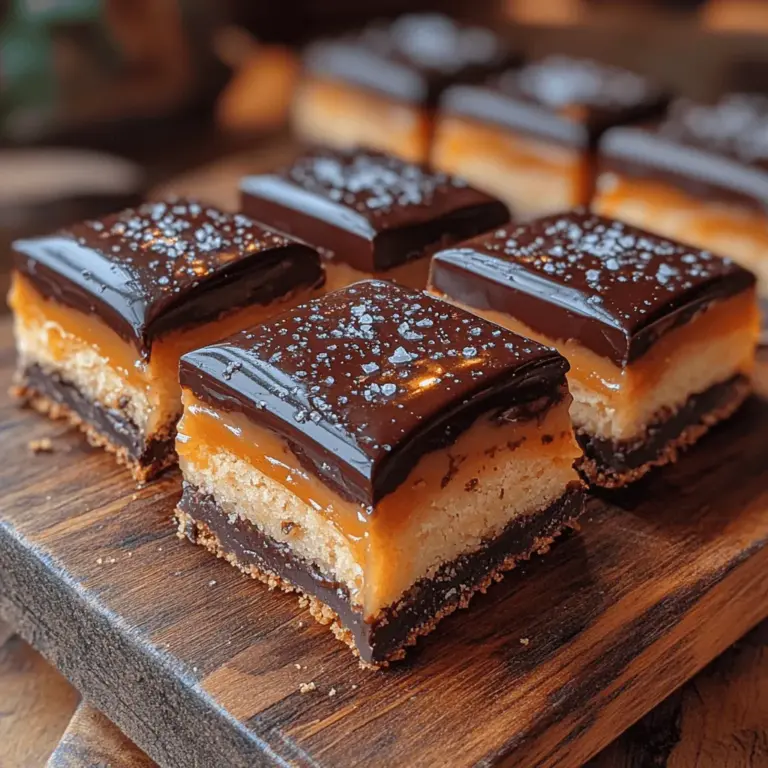
With these steps, you are well on your way to creating a stunning Dreamy No-Bake Millionaire’s Shortbread that is sure to impress both your family and friends. This dessert not only looks beautiful but also tastes divine, making it a perfect addition to any dessert table or a sweet treat for a quiet evening at home. As you prepare to serve, keep in mind that the layers should be distinct and beautifully defined, showcasing the hard work and love that went into making this luxurious treat.
{{image_2}}
Melting Chocolate: Mastering Techniques for a Perfect Finish
When it comes to achieving the silky smooth chocolate topping for your Dreamy No-Bake Millionaire’s Shortbread, the method of melting chocolate is critical. Two popular techniques are the double boiler method and the microwave method. Understanding how to execute both can elevate your dessert’s presentation and taste.
Double Boiler Method
The double boiler method is often preferred by seasoned bakers for its gentle heating, which minimizes the risk of burning the chocolate. To use this technique, follow these steps:
1. Prepare Your Equipment: Fill a saucepan with a couple of inches of water and bring it to a gentle simmer. Choose a heatproof bowl that fits snugly over the saucepan without touching the water.
2. Add Chocolate: Place your chopped chocolate (preferably high-quality chocolate) into the bowl. Stir constantly with a spatula as the steam from the simmering water gradually melts the chocolate.
3. Achieve Smoothness: Once melted, remove the bowl from the heat and continue to stir until fully smooth. This process helps to incorporate any remaining solid pieces.
Microwave Method
The microwave method is quicker and convenient, especially if you’re in a hurry. However, it requires careful attention to avoid overheating. Here’s how to do it:
1. Chop Chocolate: Place your chopped chocolate into a microwave-safe bowl.
2. Microwave in Intervals: Heat the chocolate in the microwave on medium power for 30 seconds. Stir the chocolate after each interval to distribute the heat evenly and prevent hot spots.
3. Continue Heating: Repeat this process until the chocolate is mostly melted, then let it sit for a minute and stir until fully melted and silky smooth.
Both methods will yield delicious results, but the double boiler method is ideal for those seeking perfect consistency and texture.
Assembling the Shortbread
Now that you have your chocolate melted and ready, it’s time to assemble your Millionaire’s Shortbread. This dessert is all about layering, and getting each layer right is essential for achieving that delightful bite of sweetness.
1. Prepare the Base: Start with your pre-prepared shortbread base. Ensure it has chilled adequately in the refrigerator for at least 30 minutes. This will help it hold its shape when layered with caramel.
2. Layer the Caramel: Once the base is set, spread an even layer of caramel over the shortbread. Use an offset spatula to smooth it out. For a more decadent flavor, consider adding a sprinkle of sea salt over the caramel layer before it sets.
3. Chill Again: After adding the caramel layer, return the shortbread to the refrigerator for about 15 minutes. This brief chilling allows the caramel to firm up, making it easier to pour on the chocolate layer without mixing.
4. Add the Chocolate Topping: Once the caramel has set, pour your melted chocolate over it. Use the spatula to spread it evenly across the surface.
5. Final Chill: Return the assembled millionaire’s shortbread to the refrigerator for at least one hour to ensure all layers are completely set. The longer you chill it, the easier it will be to cut into clean squares later.
Presentation and Serving Suggestions
The visual appeal of your Millionaire’s Shortbread can elevate its allure. Here are some creative ideas for presentation and serving that will impress your guests.
Visual Appeal
– Rustic Serving Board: Serve your shortbread on a rustic wooden board for a charming, homey feel. This adds warmth and a touch of elegance to your dessert table.
– Chocolate Drizzle: For an extra touch of sophistication, drizzle some melted chocolate on top of the set chocolate layer before serving. This not only enhances the look but also deepens the chocolate flavor.
– Garnish with Sea Salt: Sprinkle a few flakes of sea salt on top just before serving. This contrast of sweet and salty can enhance the overall flavor experience.
Pairing Suggestions
To create a complete culinary experience, consider pairing your Dreamy No-Bake Millionaire’s Shortbread with complementary beverages and desserts. Here are some ideas:
– Beverages: A cup of freshly brewed coffee or a rich hot chocolate can pair beautifully with the indulgence of millionaire’s shortbread. For a refreshing alternative, consider serving it with a glass of cold milk or a sweet dessert wine.
– Additional Desserts: If you’re hosting a gathering, consider serving the millionaire’s shortbread alongside other desserts such as fruit tarts or an assortment of cookies. The variety will make for an impressive dessert spread.
Nutritional Information and Dietary Considerations
Understanding the nutritional content and dietary considerations of your desserts can help you make informed choices.
Analyzing the Nutritional Profile
A typical serving of Millionaire’s Shortbread contains approximately 250-300 calories, depending on the specific ingredients used. Key components like butter, sugar, and chocolate contribute to the calorie count, but also provide the rich flavors that define this dessert. Here’s a brief overview of the main ingredients:
– Shortbread: Provides a buttery, crumbly texture.
– Caramel: Adds sweetness and richness.
– Chocolate: Offers a smooth finish and enhances the overall flavor.
Considerations for Dietary Restrictions
To make this dessert more accessible for various dietary needs, consider the following modifications:
– Gluten-Free Option: Substitute regular flour with a gluten-free flour blend. Ensure all other ingredients, particularly chocolate and caramel, are gluten-free.
– Dairy-Free Alternative: Use dairy-free butter and dark chocolate to cater to those avoiding dairy. Coconut milk can be a great substitute for traditional caramel to keep the creamy texture.
These modifications allow more people to enjoy the delectable layers of this millionaire’s shortbread while accommodating their dietary preferences.
Conclusion: The Joy of Homemade Millionaire’s Shortbread
Dreamy No-Bake Millionaire’s Shortbread stands out as an irresistible dessert that balances simplicity with indulgence. With its delightful layers of buttery shortbread, rich caramel, and silky chocolate, this recipe is sure to become a favorite in your household. Whether you’re celebrating a special occasion or simply indulging in a sweet treat, this dessert embodies the joy of homemade cooking and the satisfaction of creating something truly special.
By mastering the techniques for melting chocolate, assembling the layers, and presenting your masterpiece, you will not only impress your family and friends but also enhance your baking skills. Embrace the art of no-bake desserts with this recipe, and enjoy the delicious results with those you cherish. Happy baking!