Deliciously Cozy Apple Cinnamon Snack Rolls Recipe
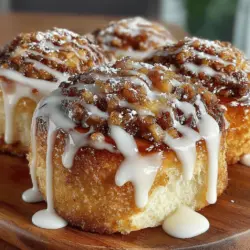
The aroma of apple cinnamon wafting through the kitchen is one of those comforting scents that instantly evokes a sense of home. This beloved flavor combination has found its way into countless baked goods, from pies to muffins, but few treats encapsulate the cozy essence quite like Apple Cinnamon Snack Rolls. These delightful rolls are perfect for any occasion, whether you’re treating yourself to a comforting dessert after a long day or serving them as a sweet addition to a weekend brunch.
The appeal of Apple Cinnamon Snack Rolls lies not only in their delicious taste but also in their ability to bring warmth and nostalgia to the table. The tartness of Granny Smith apples perfectly complements the sweetness of brown sugar and the warmth of cinnamon, creating a flavor profile that is both familiar and comforting. As you take a bite, the soft, pillowy dough envelops a gooey filling that makes these rolls a true indulgence.
Understanding the Ingredients
To create the perfect Apple Cinnamon Snack Rolls, understanding each ingredient’s role is essential. This recipe centers around three main components: the dough, the filling, and the glaze.
Dough: The foundation of any great roll begins with the dough. All-purpose flour is the primary ingredient, providing structure and chewiness. Sugar not only sweetens the dough but also contributes to browning during baking. Salt is crucial for flavor enhancement and balancing sweetness. Yeast plays a vital role in leavening, helping the dough rise and creating the light, airy texture that is characteristic of rolls.
Filling: The filling is where the magic truly happens. Granny Smith apples are the star of the show, known for their perfect balance of sweetness and tartness. Their firm texture holds up well during baking, ensuring that each bite contains a satisfying crunch. Brown sugar adds depth and a caramel-like flavor, while cinnamon infuses the mixture with warmth and spice. Together, these ingredients create a filling that is both flavorful and aromatic.
Glaze: To elevate these rolls to the next level, a simple glaze is added after baking. This sweet finishing touch not only enhances the overall sweetness but also provides a glossy sheen that makes the rolls visually appealing. A glaze made from powdered sugar and a splash of milk is the perfect complement to the rich flavors of the rolls.
Step-by-Step Guide to Making Apple Cinnamon Snack Rolls
Now that we’ve covered the ingredients, let’s dive into the step-by-step process of making these delicious Apple Cinnamon Snack Rolls.
Preparing the Dough
1. Activating the Yeast: Begin by activating your yeast, which is essential for achieving the perfect rise. Combine warm water (about 110°F) with sugar and sprinkle the yeast over the top. Allow it to sit for about 5-10 minutes until it becomes frothy. This step ensures that the yeast is alive and ready to work its magic.
2. Mixing Dry and Wet Ingredients: In a large mixing bowl, whisk together the all-purpose flour and salt. Once the yeast mixture is ready, add it to the bowl along with melted butter and an egg. Mix the ingredients until a shaggy dough begins to form.
3. Kneading the Dough: Transfer the dough to a lightly floured surface and knead for about 8-10 minutes. The goal is to develop the gluten, which will give the rolls their structure. The dough should be smooth and elastic, slightly tacky but not overly sticky.
4. First Rise: Place the kneaded dough in a greased bowl, cover it with a clean kitchen towel, and let it rise in a warm, draft-free area. This first rise should take about 1 to 1.5 hours or until the dough has doubled in size.
Crafting the Filling
While the dough is rising, it’s time to prepare the filling.
1. Selecting Apples: Choose Granny Smith apples for this recipe, as their tartness and firm texture make them ideal for baking. You will need about 3-4 medium-sized apples, peeled, cored, and diced into small pieces.
2. Combining Ingredients: In a large bowl, toss the diced apples with brown sugar, cinnamon, and a splash of lemon juice. The lemon juice not only brightens the flavor but also helps prevent the apples from browning too quickly. Ensure that each piece of apple is well-coated with the sugar and spice mixture.
3. Creating the Filling: Allow the filling to sit for a few minutes to let the flavors meld together. This will also help release some moisture from the apples, ensuring that the filling is juicy but not overly wet when added to the rolls.
Assembling the Rolls
Once the dough has risen and the filling is ready, it’s time to assemble your Apple Cinnamon Snack Rolls.
1. Shaping the Dough: After the first rise, punch down the dough to release any trapped air. Roll it out on a floured surface into a large rectangle, approximately ¼ inch thick. Aim for a size of about 12×18 inches, which will provide enough space for generous filling.
2. Adding the Filling: Spread the apple filling evenly across the rolled-out dough, leaving a small border around the edges. This will help prevent the filling from spilling out while baking.
3. Rolling Up: Starting from one long edge, carefully roll the dough into a tight log. Make sure to keep the roll tight but not so tight that it squishes the filling. Once rolled, pinch the seams to seal.
4. Cutting the Rolls: Using a sharp knife or a dough cutter, slice the rolled dough into equal pieces, about 1 to 1.5 inches thick. Place the rolls into a greased baking dish, leaving a bit of space between each one to allow for rising.
With the rolls assembled, you are now ready to let them rise again before baking. This second rise is crucial for achieving that light and fluffy texture.
As you embark on this baking adventure, the anticipation of the warm, gooey rolls fresh from the oven is sure to fill your kitchen with excitement. Stay tuned for the next part of this recipe, where we will explore the final steps of baking and glazing these delectable Apple Cinnamon Snack Rolls.
{{image_2}}
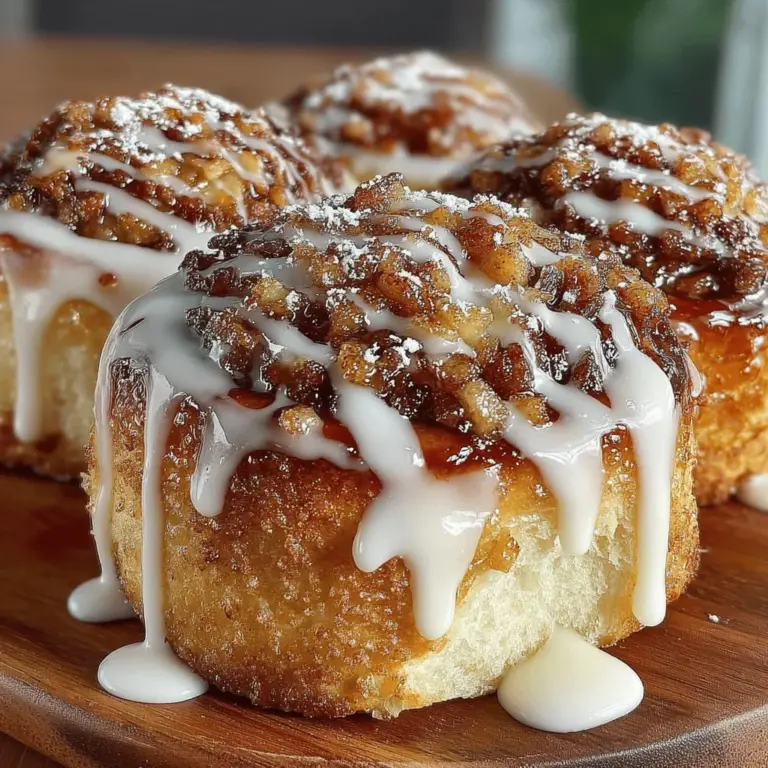
Apple cinnamon snack rolls are a delightful pastry that can brighten any day with their comforting flavors and aroma. The process of making these rolls is not only rewarding but also a fantastic way to indulge in the joys of baking. In this section, we will explore key techniques for rolling the dough, the importance of the second rise, how to bake the rolls to perfection, and tips for glazing and serving them attractively.
Techniques for Rolling the Dough Evenly and Tightly
Rolling the dough for your apple cinnamon snack rolls is a crucial step in ensuring that your rolls bake evenly and maintain a beautiful shape. Here are some tips to achieve that optimal roll:
1. Flour Your Surface: Before you begin rolling, lightly flour your work surface and the dough to prevent sticking. This will help you roll out the dough smoothly without tearing it.
2. Use a Rolling Pin: Start from the center of the dough and roll outward, applying even pressure. Rotate the dough as you go to maintain a rectangular shape. Aim for an even thickness of about 1/4 inch.
3. Tight Rolling: Once you’ve spread the filling over the dough, begin rolling from one end. Tuck the edge of the dough over the filling and roll tightly while pressing gently to seal in the filling. This tightness will help the rolls keep their shape and create those delectable swirls.
4. Sealing the Edge: After rolling, pinch the seam to secure it. This prevents the filling from leaking out during baking and helps the rolls maintain their structure.
Importance of Leaving a Border When Spreading the Filling
When preparing your filling, it is essential to leave a border around the edges of the dough. This border serves several purposes:
– Prevents Spillage: Leaving a 1-inch border around the edges ensures that the filling doesn’t ooze out, which can create a mess in the oven and lead to less-than-perfect rolls.
– Aids in Sealing: The border allows you to pinch the edges more effectively, ensuring that the filling is encapsulated within the dough.
– Improves Presentation: A neat edge enhances the overall appearance of the rolls, making them look professionally made rather than homemade.
Tips on Cutting the Rolls for Uniform Baking
Achieving uniform slices is key when cutting the rolls for baking. Here’s how to cut them evenly:
1. Use a Sharp Knife: A sharp serrated knife or a bench scraper is ideal for cutting through the rolls without squishing them.
2. Mark the Cuts: Before slicing, gently mark the dough with the knife where you plan to cut. This ensures that each piece is of equal size.
3. Cut with a Gentle Motion: Apply light pressure as you cut through the dough. Avoid pressing down too hard, as this can compress the dough and result in denser rolls.
4. Slice Evenly: Aim for cuts that are about 1 to 1.5 inches apart. This size is perfect for achieving a nice balance between the dough and filling in each roll.
Second Rise: The Crucial Step
After cutting the rolls, the second rise is a step you cannot afford to skip. It is essential for achieving that light and fluffy texture that makes these rolls irresistible.
Explanation of Why the Second Rise is Essential for Fluffy Rolls
The second rise allows the yeast to work its magic a second time, producing carbon dioxide that creates air pockets in the dough. These air pockets are what give the rolls their fluffy texture. Skipping this step could result in denser, less appealing rolls.
Creating a Warm Environment for Optimal Rising
To help your rolls rise effectively, create a warm environment. Here are some tips:
– Use the Oven: Preheat your oven to the lowest setting (around 200°F), then turn it off. Place your rolls in the warm oven, covering them with a clean kitchen towel. The gentle heat will encourage the dough to rise.
– Choose a Warm Spot: If you don’t want to use the oven, place the rolls in a warm spot in your kitchen, away from drafts. A sunny window or on top of the refrigerator can work well.
Baking the Rolls
With the rolls risen and ready, it’s time to bake them. Here’s how to ensure they come out perfectly.
Preheating the Oven: Why This Step Matters for Even Baking
Preheating your oven is vital for even baking. If you place the rolls in a cold oven, they may not rise properly and can lead to uneven baking. Always preheat your oven to 350°F (175°C) before placing the rolls inside.
Signs to Look for When Determining Doneness
When your rolls are baking, keep an eye out for these signs to check if they are done:
– Golden Brown Color: The tops of the rolls should turn a beautiful golden brown, indicating that they are cooked through.
– Spring Back Test: Gently press the top of a roll; it should spring back if it is done. If it leaves an indentation, it likely needs more time in the oven.
– Internal Temperature: For the most accurate assessment, use a kitchen thermometer. The internal temperature should reach about 190°F (88°C).
Preparing the Glaze
While the rolls are baking, you can prepare a simple and delicious glaze to drizzle over them once they are out of the oven. A glaze elevates the flavor and adds a beautiful finish.
Simple Ingredients That Make a Delicious Glaze
For the glaze, you will need:
– Powdered Sugar: This is the base of your glaze.
– Milk or Cream: To thin out the powdered sugar and create a smooth glaze. You can also use non-dairy milk for a vegan option.
– Vanilla Extract: This adds a lovely flavor to the glaze.
Mixing Techniques for Achieving a Smooth Consistency
To achieve a smooth glaze:
1. Combine Ingredients: In a mixing bowl, whisk together 1 cup of powdered sugar with 2-3 tablespoons of milk and 1 teaspoon of vanilla extract.
2. Adjust Consistency: If the glaze is too thick, add more milk, one teaspoon at a time, until you reach your desired consistency. It should be pourable but not too runny.
3. Whisk Until Smooth: Make sure to whisk it thoroughly to avoid lumps and achieve a silky texture.
Glazing and Serving the Rolls
Once the rolls are out of the oven and cooled for a few minutes, it’s time to glaze and serve.
Timing for Glazing After Baking for Best Results
Let the rolls rest for about 5 minutes after baking. This allows them to set slightly but still be warm enough for the glaze to adhere. Drizzle the glaze generously over the warm rolls, allowing it to seep into the cracks and crevices for maximum flavor.
Presentation Ideas for Serving the Rolls Attractively
To serve your apple cinnamon snack rolls attractively:
– Place on a Serving Platter: Arrange the rolls on a beautiful platter, either in a circular formation or stacked for a rustic look.
– Garnish: Consider garnishing with a sprinkle of cinnamon or chopped nuts for added texture and visual appeal.
– Serve with Sides: Pair the rolls with a side of whipped cream or vanilla ice cream for an indulgent treat.
Nutritional Information
When indulging in these apple cinnamon snack rolls, it’s important to consider their nutritional content. Here’s a breakdown per serving (1 roll):
– Calories: Approximately 200
– Total Fat: 6g
– Saturated Fat: 3g
– Cholesterol: 20mg
– Sodium: 150mg
– Total Carbohydrates: 32g
– Dietary Fiber: 1g
– Sugars: 8g
– Protein: 3g
Discussion of Any Dietary Considerations
These rolls can easily be adapted for vegan diets by substituting dairy ingredients with plant-based alternatives. Use almond milk or coconut milk instead of regular milk, and choose a dairy-free butter substitute.
Conclusion
Making apple cinnamon snack rolls is a delightful activity that brings warmth and joy to your kitchen. With the steps outlined—rolling, rising, baking, and glazing—you have all the tools necessary to create these mouthwatering treats. The smell of cinnamon and apples wafting through your home will evoke fond memories and create new ones as you share these rolls with family and friends.
Embrace the joy of baking and don’t hesitate to experiment with variations. Perhaps you might want to add nuts, dried fruits, or even a drizzle of caramel for an extra indulgence. Each batch can be a unique creation, allowing you to put your personal touch on this beloved recipe. Happy baking!