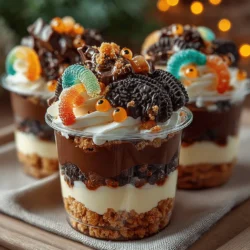
Spooky Halloween Dirt Cups Recipe
As the leaves turn crisp and the air becomes cooler, families and friends gather to celebrate one of the most imaginative holidays of the year: Halloween. This festive occasion is not only known for its spooky decorations and thrilling costumes but also for its delightful array of themed treats. Among the myriad of Halloween desserts, Spooky Halloween Dirt Cups stand out as a creative and engaging option that captures the spirit of the season.
These fun-filled cups, layered with chocolatey goodness and adorned with whimsical decorations, are perfect for both children and adults. They evoke a sense of nostalgia while introducing a modern twist to traditional Halloween treats. The interactive nature of this recipe allows everyone to get involved in the kitchen, making it a fantastic activity for families looking to bond over baking.
The Allure of Halloween Treats
Halloween has a unique way of bringing out the child in all of us. The popularity of themed desserts skyrockets during this spooky season, as people seek to indulge in treats that are as visually appealing as they are delicious. From pumpkin-shaped cookies to ghostly cupcakes, the variety is endless, but one treat stands out for its simplicity and creativity: the Dirt Cup.
These cups are not just about taste; they also spark joy and nostalgia. Many adults fondly recall making similar desserts during their own childhoods, which adds a layer of sentimental value to the creation process. Additionally, making Halloween treats at home can be a fun family activity, allowing for creativity and personal expression. With Spooky Halloween Dirt Cups, everyone can participate in the fun, whether it’s crushing cookies, mixing pudding, or decorating the final product.
Ingredients for Spooky Halloween Dirt Cups
Creating Spooky Halloween Dirt Cups is a straightforward process that requires only a few key ingredients. Each component plays an essential role in building the layers of flavor and texture that make this dessert a hit at any Halloween gathering. Here’s what you’ll need:
1. Chocolate Sandwich Cookies: The cornerstone of this recipe is chocolate sandwich cookies, often recognized by the popular brand Oreos. These cookies serve as the “dirt” base for the cups, offering a rich chocolate flavor and a crumbly texture that mimics real dirt.
2. Instant Chocolate Pudding Mix: This ingredient adds a creamy richness to the dessert. The instant pudding mix is easy to prepare and contributes a decadently smooth layer that perfectly complements the cookie crumbs.
3. Whipped Topping: To lighten the overall texture of the Dirt Cups, whipped topping is used. It provides a fluffy element that balances the dense pudding and cookie layers, making each bite a delightful experience.
4. Gummy Worms: No dirt cup would be complete without the classic gummy worms. These playful candies not only enhance the visual appeal but also add a chewy texture that kids and adults alike will enjoy.
5. Spooky Edible Decorations: To elevate the Halloween theme, consider adding various edible decorations, such as candy eyeballs, sprinkles shaped like bats or ghosts, and other fun toppings. These decorations allow for personalization and creativity, making each cup unique.
6. Optional Serving Vessels: While plastic cups are commonly used for serving, you could also opt for terra-cotta pots for a more authentic “dirt” look. These can be found at craft stores and can add a rustic charm to the presentation.
Step-by-Step Instructions
Preparing the Cookie Crumbs
The first step in crafting your Spooky Halloween Dirt Cups is to prepare the cookie crumbs. Crushing the chocolate sandwich cookies can be both fun and satisfying, and there are several methods to achieve the perfect texture.
1. Using a Food Processor: For a quick and efficient method, place the cookies in a food processor and pulse until they reach a fine crumb consistency. This method is ideal for those who want to save time and ensure even texture.
2. By Hand: If you prefer a more hands-on approach, you can place the cookies in a resealable plastic bag and use a rolling pin to crush them into crumbs. This method can be a fun activity for kids, allowing them to take part in the preparation process.
3. Texture Matters: As you crush the cookies, aim for a texture that resembles loose dirt. The crumbs should be fine enough to layer easily in the cups but still have some larger pieces for added texture. This will create a realistic “dirt” effect once the cups are assembled.
As you prepare the cookie crumbs, the anticipation of assembling your Spooky Halloween Dirt Cups builds. This simple yet engaging task sets the tone for a delightful dessert that will surely become a favorite in your Halloween repertoire.
Stay tuned for the next part of this article, where we will delve into the assembly of these delicious treats and explore creative decorating ideas that will make your Dirt Cups the star of your Halloween celebration.
{{image_2}}
Creating the Chocolate Pudding Layer
To start crafting your Spooky Halloween Dirt Cups, the first essential layer is the chocolate pudding. This not only serves as a delicious base but also adds a rich, creamy texture that is crucial for the overall experience of this dessert. Begin by gathering your ingredients: instant chocolate pudding mix, milk, and a mixing bowl.
Preparation Process:
1. In a large mixing bowl, combine the instant chocolate pudding mix with the cold milk. Using a whisk, mix the ingredients together vigorously.
2. Whisking is key—aim for at least two minutes until the mixture thickens. This will ensure that the pudding reaches the ideal consistency, which should be smooth and creamy. Proper whisking incorporates air into the pudding, enhancing its lightness and making it more enjoyable to eat.
3. Once the pudding has thickened, let it sit for about 5 minutes. This resting period allows the flavors to develop further.
The final texture of your pudding should be velvety and slightly firm, which complements the crunch of the cookie layer in the Dirt Cups. This contrast between textures is what makes each bite of the dessert so delightful.
Incorporating Whipped Topping
Next up is the whipped topping, which adds a light and airy element to your dessert. You’ll want to incorporate this component carefully to maintain its fluffy texture.
Folding Technique:
1. Take about 2 cups of whipped topping and add it to the bowl of chocolate pudding.
2. Using a spatula, gently fold the whipped topping into the pudding. This means you should scoop from the bottom of the bowl and bring the mixture up and over itself, rather than stirring vigorously. The goal is to keep the airiness of the whipped topping, which will create a lighter, more delicate pudding layer.
This creamy, airy mixture adds a wonderful flavor and texture contrast to the denser chocolate pudding, making each spoonful a balanced treat that’s both rich and light.
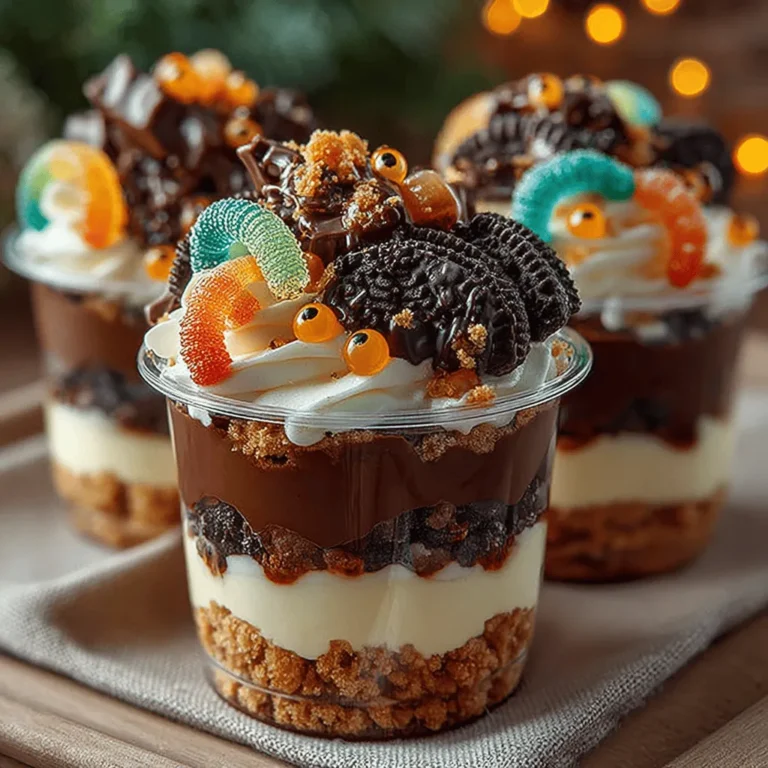
Layering the Cups
Now that your pudding and whipped topping are ready, it’s time to assemble the Dirt Cups. This layering process is crucial not just for taste but for presentation as well.
Layering Process:
1. Begin by crushing your chocolate sandwich cookies. You can place them in a resealable plastic bag and crush them with a rolling pin, or use a food processor for a finer texture. Set aside some cookie crumbs for garnish.
2. In clear cups or small mason jars, start with a layer of the crushed cookies at the bottom. This will serve as the “dirt” layer.
3. Follow this with a layer of the chocolate pudding mixture. Use a spoon to gently spread it evenly over the cookie layer.
4. Add another layer of crushed cookies on top of the pudding, followed by another layer of the pudding mixture. Repeat this process until your cups are filled, finishing with a layer of cookie crumbs on top.
Presentation Tips:
– Ensure that the layers are visible through the clear cups; this adds to the visual appeal of the dessert.
– Consider using cups of varying heights for added interest.
– For an extra touch, you can use a piping bag to layer the pudding and whipped topping for a more polished look.
Decorating for Halloween
Now comes the fun part: decorating your Spooky Halloween Dirt Cups! This step allows you to get creative and make your dessert festive.
Creative Decoration Ideas:
1. Gummy Worms: Drape gummy worms over the top layer of crushed cookies, letting some hang over the edge of the cup for a creepy effect.
2. Edible Decorations: Sprinkle edible glitter or candy eyeballs on top for a whimsical touch. You can also use Halloween-themed sprinkles to enhance the visual appeal.
3. Grave Markers: Use small pieces of chocolate or cookies to create “tombstones” sticking out of the cookie layer. You can write names or spooky messages on the chocolate with edible markers.
The importance of aesthetics cannot be overstated, especially for themed desserts like these. A beautifully decorated cup will not only look appealing but also create excitement and anticipation for your guests.
Chilling and Serving the Dessert
After assembling and decorating your Spooky Halloween Dirt Cups, the next step is chilling. This is a crucial part of the preparation process.
Chilling Process:
– Place your assembled cups in the refrigerator for at least 1-2 hours before serving. Chilling allows the layers to set properly and melds the flavors, enhancing the overall taste of the dessert.
Serving Suggestions:
– Serve your Dirt Cups with Halloween-themed utensils or napkins for added flair.
– Consider placing each cup on a spooky-themed platter or in a cauldron for a dramatic presentation.
Nutrition Information
While Spooky Halloween Dirt Cups are a delightful treat, it’s important to be mindful of the ingredients and their nutritional content. Here’s a brief look at what goes into your dessert:
– Chocolate Pudding Mix: Typically contains sugar, cocoa, and stabilizers.
– Whipped Topping: While it adds creaminess, it also contributes fats and sugars.
– Chocolate Sandwich Cookies: These are often high in sugar and calories but provide that essential “dirt” texture.
When enjoying such festive desserts, balance is key. While Dirt Cups are indulgent, they can be enjoyed in moderation as part of a festive celebration. Encourage your guests to savor each bite, appreciating the flavors and textures rather than consuming them all at once.
Conclusion
Creating Spooky Halloween Dirt Cups is not just about following a recipe; it’s about embracing the spirit of Halloween and enjoying the process of making something fun and delicious. This layered dessert offers a perfect balance of creamy chocolate pudding, airy whipped topping, and crunchy cookie layers, making it a crowd-pleaser at any Halloween gathering.
The joy of sharing themed desserts during Halloween enhances the holiday spirit, allowing families and friends to come together and create lasting memories. So, gather your ingredients, unleash your creativity, and have fun with this easy, delightful recipe. Your Spooky Halloween Dirt Cups are sure to be a hit!