Crispy Golden Chicken Tenders: A Delicious Comfort Food
Chicken tenders are more than just a meal; they represent comfort and nostalgia, evoking memories of family dinners and casual gatherings. This beloved dish is a favorite among both children and adults, thanks to its tender, juicy meat and irresistible crispy coating. Whether served as a quick weeknight dinner, a party appetizer, or a satisfying snack, chicken tenders are incredibly versatile and can be enjoyed in a variety of ways. They can be served with dipping sauces, included in salads, or tucked into sandwiches, making them an all-time crowd-pleaser.
In this recipe, we focus on achieving that perfect crispy, golden exterior that makes chicken tenders so appealing. The secret lies not only in the coating but also in the marinating process, which enhances both flavor and texture. With a flavorful marinade and a seasoned coating, you can create chicken tenders that are not only delicious but also memorable.
The Magic of Marinating Chicken Tenders
One of the key steps in preparing chicken tenders is the marinating process, which is essential for maximizing flavor and achieving the perfect texture. Buttermilk is the star ingredient in our marinade, and for good reason. The acidity in buttermilk helps break down the proteins in the chicken, resulting in incredibly tender meat. This is especially important for chicken tenders, as they can easily become dry if not properly prepared.
For those looking to elevate their chicken tenders further, adding a splash of hot sauce to the buttermilk marinade introduces a delightful kick of flavor. This optional ingredient not only enhances the taste but also adds depth to the overall profile of the dish. The combination of buttermilk and hot sauce creates a marinade that not only tenderizes but also infuses the chicken with a savory, slightly spicy flavor that keeps everyone coming back for more.
When it comes to marinating chicken tenders, timing is crucial. For optimal results, allow the chicken to soak in the buttermilk mixture for at least 1 to 2 hours. However, if you have the time, marinating overnight will yield even better results, as the flavors will penetrate the meat more thoroughly.
Creating the Perfect Coating
Once your chicken tenders have marinated to perfection, it’s time to prepare the coating that will give them their signature crispy texture. The right combination of dry ingredients is essential for achieving that golden crust that everyone loves. A classic coating typically includes all-purpose flour, cornstarch, and a blend of spices that work together to enhance the flavor of the chicken.
The flour is the foundation of the coating, providing the structure needed to achieve crispiness. Cornstarch is a game-changer; it helps to create a lighter, crunchier texture when fried. This combination ensures that the chicken tenders will not only be crispy on the outside but also retain their juiciness on the inside.
In terms of spices, paprika, garlic powder, and onion powder are some of the most popular choices. Paprika adds a subtle smokiness and a rich color to the coating, while garlic powder and onion powder contribute aromatic flavors that elevate the overall taste. It’s important to balance these spices to ensure they complement the chicken without overpowering it. A pinch of salt and pepper is also essential to enhance the natural flavors of the chicken and bring everything together.
For the best results, the chicken tenders should be well-coated in the dry mixture. This means fully dredging each piece in the flour mixture to achieve an even coating. A consistent layer of flour is crucial for creating that coveted crispy exterior.
Frying Techniques for Crispy Chicken Tenders
Now that the chicken tenders are marinated and coated, it’s time to fry them to crispy perfection. The choice of oil is an important factor in the frying process. For the best results, opt for oils with high smoke points, such as vegetable oil, canola oil, or peanut oil. These oils can withstand high temperatures without burning, allowing the chicken tenders to cook evenly and achieve that golden brown color.
Prior to frying, it’s essential to prepare the oil correctly. Fill a deep skillet or fryer with about 2 to 3 inches of oil, ensuring there is enough space for the chicken to cook without overcrowding. To test if the oil is ready, drop a small amount of the coating into the oil; if it sizzles and rises to the surface, you’re good to go. The ideal frying temperature is around 350°F (175°C). Maintaining this temperature is key to achieving crispy chicken tenders that are cooked through without being greasy.
Once the oil is at the right temperature, carefully add the chicken tenders in batches, ensuring not to overcrowd the pan. Frying them in small groups allows for even cooking and helps maintain the oil temperature. Cook the tenders for about 4 to 5 minutes on each side, or until they are golden brown and reach an internal temperature of 165°F (74°C).
By following these initial steps, you’ll be well on your way to creating delicious, crispy golden chicken tenders that are sure to impress. Stay tuned for the next part of this guide, where we will explore serving suggestions, dipping sauces, and tips for storing and reheating your chicken tenders.
{{image_2}}
Safety Precautions When Frying
When frying chicken tenders, safety is paramount to ensure a smooth and enjoyable cooking experience. Here are essential precautions to take:
1. Avoiding Splatter: Hot oil can be dangerous; it splatters easily. Use a deep, heavy-bottomed pot or a deep fryer with a lid to minimize splatter. If using an open pot, consider using a splatter screen to protect your kitchen.
2. Ensuring Even Cooking: Maintain a consistent oil temperature (around 350°F or 175°C) to ensure even cooking. Use a thermometer to monitor the temperature, adjusting the heat as necessary. If the oil is too hot, the outside will burn before the inside is cooked; too cool, and your tenders will absorb excess oil and become greasy.
3. Handling Hot Oil: Always remember to keep a safe distance from the pot while frying. Use long-handled utensils to avoid burns.
4. Using a Meat Thermometer: To ensure your chicken tenders are cooked thoroughly, use a meat thermometer. The internal temperature should reach 165°F (74°C) to guarantee safety.
Step-by-Step Guide to Cooking Chicken Tenders
Dredging Techniques for Even Coating
Achieving a perfectly crispy coating on your chicken tenders relies heavily on the dredging process. Here’s how to do it effectively:
1. Prepare Your Dredging Stations: Set up three shallow dishes. The first dish should contain seasoned flour (flour mixed with salt, pepper, and any other spices you prefer). The second dish should be filled with beaten eggs, and the third should contain breadcrumbs or panko for that extra crunch.
2. Dredging Process:
– First Coat: Start by taking a chicken tender and dredging it in the seasoned flour. Ensure it’s evenly coated, shaking off any excess flour.
– Egg Bath: Next, dip the floured tender into the egg mixture, allowing any excess egg to drip off.
– Final Coating: Finally, roll the tender in the breadcrumb mixture, pressing gently to ensure the crumbs adhere well.
Tips on Frying in Batches
Frying chicken tenders in batches is crucial for achieving crispy results without overcrowding the frying pan. Here’s how to do it effectively:
1. Batch Size: Depending on the size of your frying vessel, aim for 3-4 tenders per batch. Overcrowding can lower the oil temperature and result in soggy tenders.
2. Timing: Cook each batch for about 4-5 minutes, turning halfway through for even browning. The tenders should be golden brown and crispy when done.
Monitoring Cooking Time and Internal Temperature
To ensure both safety and quality, monitoring the cooking time and internal temperature is essential:
1. Use a Meat Thermometer: Insert it into the thickest part of a tender. When it registers 165°F (74°C), your chicken is safe to eat.
2. Visual Cues: Look for a golden-brown color and a crispy exterior. If they are browning too quickly, reduce the heat slightly.
Post-Frying Care: Keeping Your Tenders Crispy
Once your chicken tenders are cooked to perfection, it’s important to maintain their crispiness:
Draining Excess Oil
1. Drain Properly: After frying, place the chicken tenders on a wire rack set over a baking sheet. This allows the excess oil to drip away while keeping the tenders crispy. Avoid placing them directly on paper towels, as this traps moisture.
Cooling Methods: Wire Rack vs. Paper Towels
1. Wire Rack: The best method for cooling is using a wire rack, as it promotes airflow around the tenders and helps maintain their crispy coating.
2. Paper Towels: If you don’t have a wire rack, paper towels can be used, but only for a short time. Transfer the tenders to a wire rack as soon as possible to prevent sogginess.
Presentation Ideas
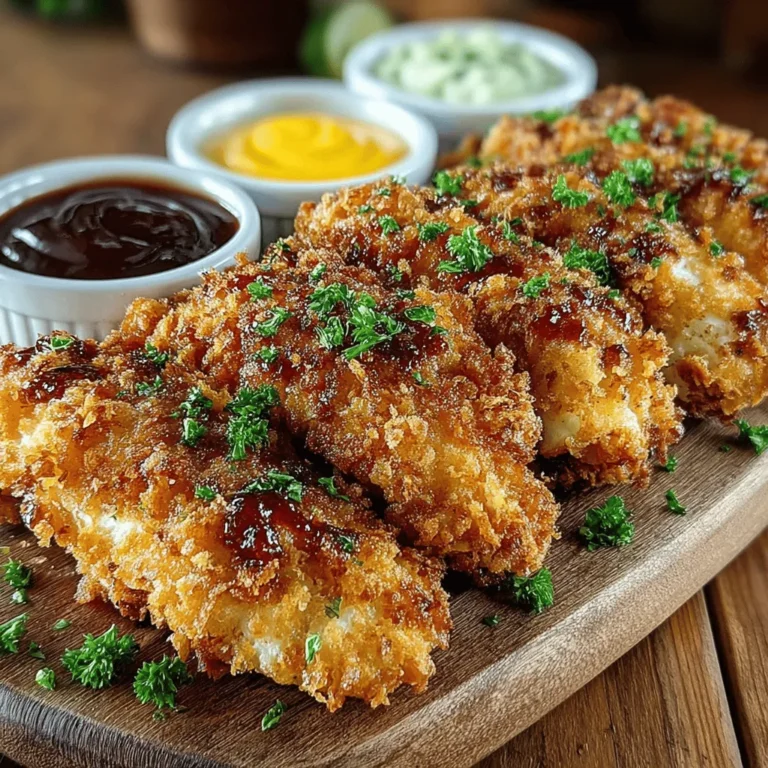
1. Attractive Serving: Arrange the chicken tenders on a platter with a garnish of fresh herbs, like parsley or cilantro. Serve with a selection of colorful dipping sauces for a visually appealing presentation.
Serving Suggestions and Pairings
Dipping Sauces
Enhance your crispy chicken tenders with these delicious dipping sauces:
1. Honey Mustard: The sweet and tangy profile complements the crispy coating perfectly.
2. Ranch Dressing: Creamy and herby, ranch dressing provides a classic pairing that many love.
3. BBQ Sauce: A tangy and smoky BBQ sauce can elevate the flavor profile of your chicken tenders.
Side Dishes
To create a well-rounded meal, consider these side dishes:
1. Coleslaw: A crunchy, tangy coleslaw adds a refreshing contrast to the crispy tenders.
2. French Fries: Crispy fries are a classic companion; try seasoning them with garlic or herbs for added flavor.
3. Mac and Cheese: For a comfort-food feast, serve your tenders with creamy mac and cheese.
Transforming Leftovers
If you have leftover chicken tenders, don’t let them go to waste! Here are a few creative ideas:
1. Chicken Tender Salad: Slice the tenders and toss them over a fresh salad with mixed greens, cherry tomatoes, and your favorite dressing.
2. Wraps: Use the tenders in a wrap with lettuce, tomatoes, and a drizzle of ranch or BBQ sauce for a quick and satisfying meal.
Conclusion
Making homemade crispy golden chicken tenders is not just a cooking project; it’s an opportunity to create a dish that brings joy to your table. From the careful dredging techniques to the satisfaction of perfectly fried tenders, every step is a celebration of flavor and texture. The versatility in pairings and sauces allows you to personalize your meal, ensuring that each experience is uniquely yours.
Don’t hesitate to experiment with different spices and flavors in your dredging mix or try out various dipping sauces. The satisfaction of serving homemade chicken tenders that are both crispy and flavorful is unmatched, making them a favorite for family dinners, gatherings, or simply a treat for yourself. Enjoy the process, savor the results, and share the joy of homemade cooking with those you love!


