Crispy Buttermilk Fried Chicken: A Culinary Delight
Fried chicken has long held a special place in the hearts (and stomachs) of people across the globe. The crunchy exterior, paired with a juicy and tender interior, creates a dish that appeals to all ages. Whether enjoyed at family gatherings, picnics, or comfort food nights, fried chicken is a beloved staple that evokes feelings of nostalgia and satisfaction. Among the myriad of fried chicken recipes, buttermilk fried chicken stands out due to its unique preparation method and rich flavors, making it a favorite for both home cooks and professional chefs alike.
This recipe for crispy buttermilk fried chicken is not just about achieving a tantalizing crunch; it incorporates buttermilk, a secret ingredient that elevates the dish by infusing it with flavor and ensuring the chicken remains tender. The process of creating this dish at home is not only fulfilling but also allows you to customize the flavors to suit your taste. The satisfaction of biting into a perfectly cooked piece of fried chicken—golden brown and crispy on the outside, succulent and juicy on the inside—is an experience that every home chef should strive for.
Understanding Buttermilk and Its Role in Fried Chicken
Buttermilk is often seen as a mere ingredient in baking, but its true culinary significance extends far beyond that. Traditionally, buttermilk is the liquid left behind after churning cream into butter. It has a tangy flavor and is slightly acidic, making it an excellent marinade for chicken. When it comes to fried chicken, buttermilk serves several vital functions that contribute to the dish’s overall success.
One of the primary benefits of using buttermilk in a marinade is its ability to tenderize the chicken. The acidity in buttermilk breaks down the proteins in the meat, resulting in a softer and more tender bite. This process is particularly effective when marinating chicken for several hours or overnight, allowing the flavors to penetrate deeply into the meat. Additionally, buttermilk helps the chicken retain moisture during the frying process, ensuring that each piece remains juicy and flavorful.
The science behind marinating chicken in buttermilk is fascinating. The lactic acid and enzymes present in buttermilk not only tenderize the meat but also create a favorable environment for flavor absorption. As the chicken soaks in the buttermilk, it becomes infused with a subtle tang that complements the spices and seasonings added later. This initial step is crucial for achieving that mouthwatering flavor profile that buttermilk fried chicken is known for.
Ingredients Breakdown
To create the perfect crispy buttermilk fried chicken, it’s important to gather the right ingredients. Each component plays a pivotal role in the overall flavor and texture of the dish.
Essential Ingredients for the Marinade
1. Buttermilk: The star of the show, buttermilk not only tenderizes the chicken but also imparts a rich flavor.
2. Hot Sauce: A few dashes of hot sauce add a kick to the marinade, enhancing the taste without overwhelming the dish.
3. Garlic Powder: This ingredient provides a subtle depth of flavor, rounding out the marinade.
4. Onion Powder: Similar to garlic powder, onion powder adds a savory note that complements the chicken.
5. Smoked Paprika: This spice introduces a hint of smokiness and a beautiful color to the fried chicken.
6. Salt and Black Pepper: Essential for seasoning, these basic ingredients enhance the overall flavor of the marinade.
Chicken Selection
When it comes to the chicken itself, there are various options to consider. You can use whole chickens cut into parts, chicken thighs, drumsticks, or breasts. Each cut has its unique characteristics:
– Thighs: Known for their rich flavor and moisture, thighs are forgiving during the cooking process.
– Drumsticks: Popular for their flavor and ease of handling, drumsticks are a favorite among many.
– Breasts: While leaner, chicken breasts can still be juicy if cooked correctly and benefit greatly from the buttermilk marinade.
Flour Coating and Seasoning
The flour coating is another critical element that contributes to the signature crunch of fried chicken. A well-seasoned flour mixture not only adheres to the chicken but also creates a crispy crust when fried. Common ingredients for the flour coating include:
– All-Purpose Flour: This is the base of the coating and provides structure.
– Cornstarch: Adding cornstarch can enhance the crispiness of the crust.
– Seasonings: Incorporate additional spices such as cayenne pepper, dried herbs, or more smoked paprika to elevate the flavor of the coating.
Choice of Frying Oil
The oil you choose for frying also impacts the overall flavor and texture of the chicken. Common options include:
– Peanut Oil: Known for its high smoke point and neutral flavor, peanut oil is a popular choice for frying.
– Vegetable Oil: Readily available and affordable, vegetable oil is another great option.
– Canola Oil: With a high smoke point and mild flavor, canola oil is a versatile choice for frying.
Step-by-Step Instructions for Crispy Buttermilk Fried Chicken
Now that you have a good understanding of the ingredients and their roles, let’s dive into the preparation process of this delicious dish.
1. Marinating the Chicken:
– Begin by preparing your chicken pieces. If using a whole chicken, cut it into parts: drumsticks, thighs, and breasts.
– In a large bowl, combine the buttermilk, hot sauce, garlic powder, onion powder, smoked paprika, salt, and black pepper. Mix thoroughly to ensure the spices are evenly distributed.
– Add the chicken pieces to the marinade, ensuring each piece is fully submerged. Cover the bowl with plastic wrap and refrigerate for at least 4 hours, or ideally overnight. This marinating time is crucial for allowing the flavors to meld and the chicken to become tender.
2. Preparing the Flour Coating:
– In a separate bowl, sift together the all-purpose flour, cornstarch, and any additional seasonings you desire. Make sure to mix well so that the seasonings are evenly distributed throughout the flour.
– Set up a dredging station with the marinated chicken and the seasoned flour. This will make the coating process easier and more efficient.
3. Dredging the Chicken:
– Remove each piece of chicken from the marinade, allowing any excess buttermilk to drip off.
– Dredge the chicken in the seasoned flour, ensuring it is fully coated. Shake off any excess flour and set aside on a wire rack. This step is essential for creating that crispy crust.
4. Frying the Chicken:
– In a heavy-bottomed pot or deep fryer, heat your chosen frying oil to 350°F (175°C). It’s essential to maintain this temperature for optimal frying.
– Carefully add the chicken pieces to the hot oil, being cautious not to overcrowd the pot. Fry in batches if necessary.
– Cook the chicken until it is golden brown and the internal temperature reaches 165°F (75°C).
By following these steps, you will be well on your way to creating a delectable crispy buttermilk fried chicken that is sure to impress your family and friends. The combination of the tender, flavorful chicken with the crunchy coating is a match made in culinary heaven, making this recipe a must-try for any fried chicken lover.
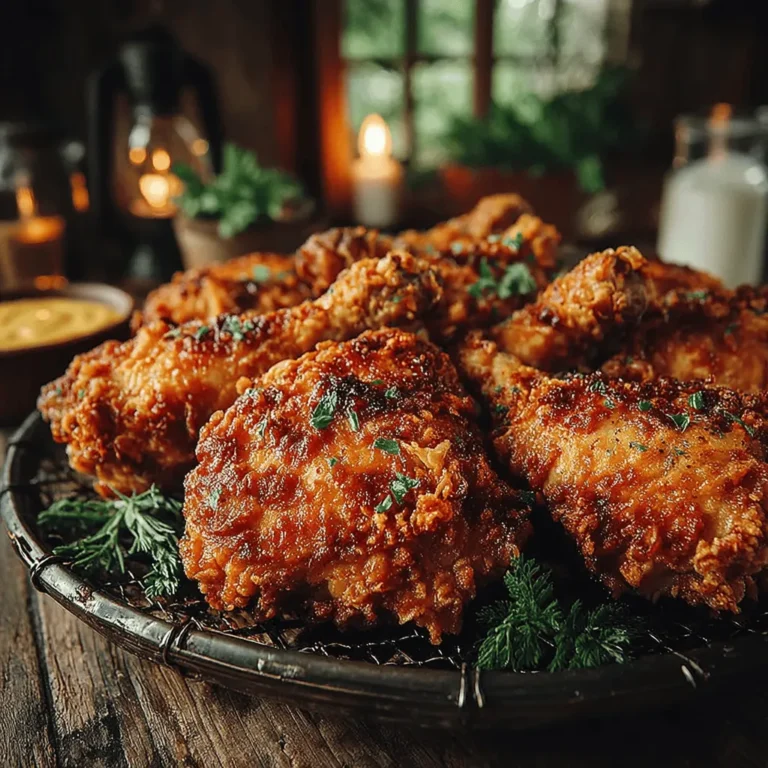
{{image_2}}
How to Properly Heat Oil for Frying
Heating oil correctly is crucial for achieving that perfect crispy texture in your fried chicken. Start by selecting a high smoke point oil, such as peanut, canola, or vegetable oil. To heat the oil, pour it into a deep, heavy-bottomed pot or a deep fryer, ensuring that it reaches at least 2-3 inches in depth.
Set your stove to medium-high heat, and use a thermometer to monitor the oil temperature. The ideal frying temperature for chicken is between 325°F to 350°F (163°C to 177°C). If you don’t have a thermometer, you can test the oil by dropping a small piece of bread or batter into the oil; if it bubbles vigorously, the oil is ready. Proper heating prevents the chicken from absorbing too much oil and becoming greasy.
Importance of Temperature and Safety Tips for Frying
Maintaining the right temperature is vital for frying success. If the oil is too hot, the exterior of the chicken will brown too quickly, leaving the inside undercooked. Conversely, if it’s too cool, the chicken will absorb excess oil, resulting in a soggy texture. Here are some safety tips to keep in mind:
– Always use a thermometer to check the oil temperature.
– Never leave hot oil unattended.
– Keep a lid nearby to smother any flames in case of an oil fire.
– Use a splatter guard or screen to minimize mess and reduce the risk of burns.
Step-by-Step Dredging Technique
Dredging is an essential process for coating your fried chicken and achieving that coveted crunch. Follow these steps for perfect dredging:
1. Prepare the Coating: In a shallow dish, combine flour with salt, pepper, and any additional spices you desire, such as paprika or garlic powder.
2. Wet and Dry Process: First, remove the chicken pieces from the buttermilk marinade, allowing excess marinade to drip off.
3. Dredge: Place the chicken in the flour mixture, pressing down gently to ensure the flour adheres well. Turn the chicken over and coat both sides thoroughly.
4. Double Dredge for Extra Crispiness: For an even crispier texture, dip the coated chicken back into the buttermilk, then return it to the flour mixture for a second coat.
Ensuring an Even Coating for Maximum Crispiness
For the crispiest fried chicken, ensure the flour coating is evenly distributed. After dredging, gently shake off any excess flour before frying. This helps avoid clumping, which can lead to uneven cooking. Additionally, allow the dredged chicken to rest on a wire rack for about 15 minutes before frying. This resting period helps the coating adhere better during cooking.
Frying the Chicken
Once your oil is heated and your chicken is properly dredged, it’s time to fry. Carefully lower the chicken into the hot oil, ensuring not to overcrowd the pot, as this can cause the oil temperature to drop. Work in batches if necessary. Fry the chicken for about 12–15 minutes, turning occasionally until golden brown.
Best Practices for Frying in Batches and Maintaining Oil Temperature
To maintain a consistent oil temperature, only fry a few pieces at a time. This ensures the oil temperature does not drop drastically, which can lead to greasy chicken. Monitor the temperature closely, adjusting the heat as needed. If you notice the temperature dropping below 325°F, increase the heat slightly to bring it back up.
Identifying Doneness Through Color and Internal Temperature
The chicken is done when it reaches an internal temperature of 165°F (74°C). Use a meat thermometer to check the thickest part of the chicken. Additionally, look for a deep golden-brown color on the outside, indicating that the breading is perfectly crispy.
Techniques for Draining and Resting the Chicken
Once the chicken is cooked, carefully remove it from the oil using tongs or a slotted spoon. Place the fried chicken on a wire rack set over a baking sheet to drain excess oil. Avoid placing the chicken directly on paper towels, as this can cause steam to build up, making the coating soggy.
Let the chicken rest for at least 10 minutes before serving. This resting period allows the juices to redistribute, ensuring a moist and tender result.
Importance of Resting for Texture
Resting is key to achieving that desired texture. As the chicken cools slightly, the coating firms up, providing a satisfying crunch with each bite. Moreover, resting allows the flavors to meld, enhancing the overall taste of your buttermilk fried chicken.
Serving Suggestions for Fried Chicken
When it comes to serving your crispy buttermilk fried chicken, there are endless possibilities to elevate your meal experience. Here are some creative ideas for plating and presentation:
Creative Ideas for Plating and Presentation
– Rustic Serving Style: Serve the chicken on a wooden board with parchment paper for a rustic, homey feel.
– Garnishing: Add fresh herbs like parsley or thyme for vibrant color and flavor contrast.
– Citrus Zest: A sprinkle of lemon or lime zest over the top can add a lovely brightness.
Recommended Side Dishes that Complement Fried Chicken
To create a well-rounded meal, pair your fried chicken with classic sides such as:
– Mashed Potatoes: Creamy mashed potatoes with gravy make for a comforting combination.
– Coleslaw: The crunchiness of coleslaw provides a cool contrast to the hot chicken.
– Cornbread: Sweet, buttery cornbread is a traditional pairing that adds a delightful touch.
Classic Pairings Like Mashed Potatoes, Coleslaw, and Salads
Don’t forget about salads to lighten the meal. A simple green salad with a tangy vinaigrette can balance the richness of the fried chicken beautifully.
Ideas for Sauces and Dips to Enhance the Meal Experience
Enhance your fried chicken experience with various sauces and dips, such as:
– Honey: Drizzle honey over the chicken for a sweet-savory combination.
– Hot Sauce: A splash of hot sauce can add a delightful kick.
– BBQ Sauce: Tangy BBQ sauce complements the crispy chicken perfectly.
Nutritional Information
While fried chicken is undeniably indulgent, it can be enjoyed in moderation as part of a balanced meal. Here’s a general overview of the nutritional aspects:
– Calories: Fried chicken is calorie-dense, largely due to the oil used in frying. Opt for smaller portion sizes.
– Protein: Chicken is a great source of protein, essential for muscle repair and growth.
– Fat: Although fried chicken contains healthy protein, it is also high in fat. Pair it with lighter sides to balance your meal.
Discussion of Portion Sizes and Balancing Meals with Sides
When enjoying fried chicken, consider portion sizes. A piece of fried chicken paired with generous servings of vegetables and whole grains can create a satisfying and nutrient-rich meal.
Common Mistakes to Avoid When Making Fried Chicken
Making fried chicken may seem straightforward, but there are common pitfalls that can lead to disappointment. Here are some mistakes to avoid:
Highlighting Potential Pitfalls During Preparation and Cooking
– Skip the Marinade: Don’t rush the marination process; allowing the chicken to soak in buttermilk enhances flavor and tenderness.
– Overcrowding the Pan: Frying too many pieces at once can lead to uneven cooking and a greasy finish.
– Neglecting to Rest: Skipping the resting step can lead to a less crispy coating and dry chicken.
Tips on How to Troubleshoot Issues Such as Sogginess or Uneven Cooking
– Sogginess: If your chicken is soggy, it may have been cooked in oil that was too cool. Always ensure the oil is hot enough before frying.
– Uneven Cooking: To avoid this, try using chicken pieces that are uniform in size, allowing for even cooking time.
Conclusion
Making crispy buttermilk fried chicken at home is a rewarding culinary adventure that brings joy and satisfaction to the table. The combination of tender chicken, flavorful buttermilk marinade, and a crispy coating creates an unforgettable dish that will impress family and friends.
So gather your ingredients, follow the steps carefully, and enjoy the delicious flavors and textures of homemade fried chicken. Whether served as a family dinner or at a festive gathering, this dish is sure to be a crowd-pleaser. Don’t hesitate to experiment with your favorite sides and sauces, and make this recipe your own. Happy frying!