Crunchy Apple Bliss Frozen Yogurt Bars: A Refreshing Dessert Option
As the temperatures rise and the days grow longer, there is an increasing desire for desserts that not only satisfy a sweet tooth but also align with a healthier lifestyle. The trend towards healthier dessert options has captured the attention of food enthusiasts and health-conscious individuals alike, leading to the creation of delicious treats that are both indulgent and nutritious. Among these, frozen yogurt bars have emerged as a favored choice, offering a delightful way to cool down while enjoying wholesome ingredients.
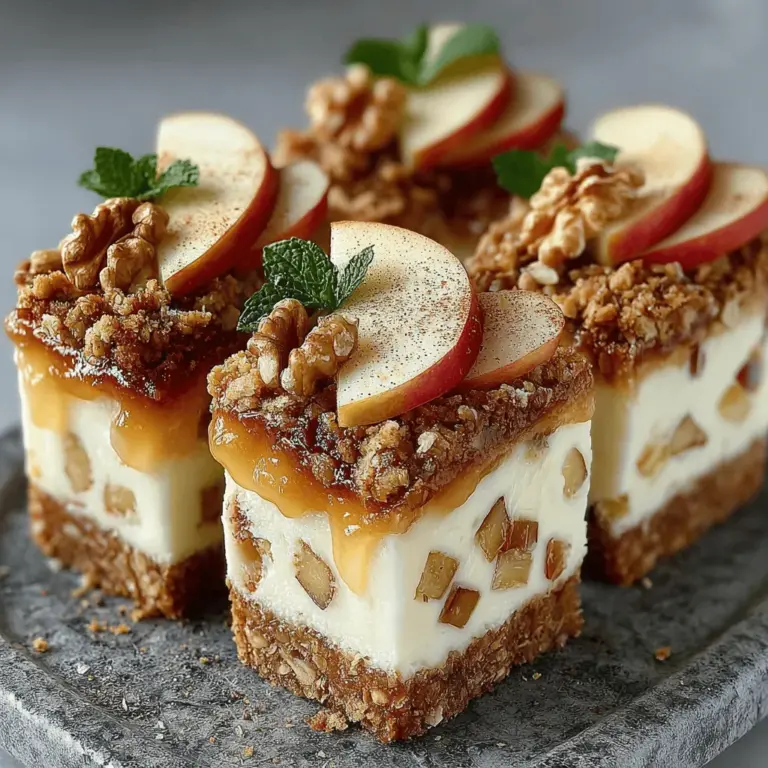
The Crunchy Apple Bliss Frozen Yogurt Bars stand out as a perfect example of this trend. Combining the creamy goodness of Greek yogurt with the natural sweetness of apples and a satisfying crunch from granola, these bars are not just a treat; they are a celebration of flavor and nutrition. Their vibrant taste and refreshing texture make them an ideal dessert for warm days, family gatherings, or a simple afternoon snack. Plus, the flexibility of the recipe allows it to cater to various dietary preferences, making it an inclusive option for everyone at the table.
Understanding Frozen Yogurt Bars
Frozen yogurt bars are a delightful alternative to traditional ice cream, providing a creamy texture and satisfying sweetness without the excessive calories and fat typically found in regular ice cream. Made primarily from yogurt, these bars present a fantastic opportunity to enjoy a frozen treat that is both refreshing and nourishing. The use of Greek yogurt, in particular, elevates these bars by introducing numerous health benefits, such as a higher protein content and the presence of probiotics, which are essential for gut health.
Not only do frozen yogurt bars offer a healthier option, but they also boast versatility in flavor combinations and ingredient substitutions. Whether you prefer fruity, nutty, or chocolate-infused desserts, the base recipe can be easily adapted to suit your palate. This flexibility makes frozen yogurt bars a perfect canvas for culinary creativity, allowing you to experiment with different ingredients and flavors while still maintaining a health-conscious approach.
Ingredient Spotlight
The success of the Crunchy Apple Bliss Frozen Yogurt Bars lies in its carefully selected ingredients, each contributing to the overall flavor and texture of the final product. Here’s a closer look at each component and its significance:
– Plain Greek Yogurt: The foundation of these bars, Greek yogurt provides a creamy texture and a rich source of protein. Unlike regular yogurt, Greek yogurt is strained to remove excess whey, resulting in a thicker consistency that holds up well when frozen. Additionally, it contains beneficial probiotics that promote digestive health.
– Sweeteners: To balance the tartness of the yogurt and apples, a natural sweetener is necessary. This recipe allows for the use of either honey or maple syrup, both of which add unique flavors. Honey brings a floral sweetness, while maple syrup offers a hint of earthiness. Adjusting the quantity of sweetener is simple; taste the mixture and add more as needed to suit your preference.
– Vanilla Extract: A splash of vanilla extract enhances the overall flavor profile of the yogurt bars. It adds a warm, aromatic note that complements the sweetness of the apples and the creaminess of the yogurt, creating a well-rounded dessert.
– Ground Cinnamon: This spice not only adds depth and warmth to the bars but also comes with numerous health benefits. Cinnamon is known for its anti-inflammatory properties and ability to regulate blood sugar levels, making it a smart addition to any dessert.
– Apples: The star ingredient of this recipe, apples provide natural sweetness and a refreshing crunch. Varieties like Granny Smith or Honeycrisp work well due to their crisp texture and balanced flavor. Choosing seasonal apples can also enhance the freshness and taste of the bars.
– Granola: Essential for achieving that delightful crunch, granola adds texture and flavor contrast to the creamy yogurt base. Opt for a granola that is low in added sugars to keep the bars healthy. You can also customize this component to include nuts, seeds, or dried fruits for added nutrition.
– Nuts: While optional, adding nuts to the recipe can boost the nutritional value and provide a satisfying crunch. Almonds, walnuts, or pecans are excellent choices, adding healthy fats and protein to the bars.
– Salt: A pinch of salt is crucial in balancing the flavors of the recipe. It enhances the sweetness and richness of the yogurt, creating a more rounded flavor experience.
Step-by-Step Instructions
To create your Crunchy Apple Bliss Frozen Yogurt Bars, follow these detailed steps to ensure a successful outcome:
1. Preparing the Baking Dish: Start by selecting an appropriate baking dish for your bars, typically an 8×8 inch or 9×9 inch square pan. Line the bottom and sides with parchment paper, allowing some overhang. This will make it easy to lift the frozen bars out of the pan once they are set, ensuring clean cuts and easy serving.
2. Mixing the Yogurt Base: In a large mixing bowl, combine the plain Greek yogurt with your chosen sweetener, vanilla extract, and ground cinnamon. Use a whisk or spatula to blend the ingredients thoroughly until smooth. The goal is to achieve a creamy mixture that is well-mixed, with an even distribution of flavors. Taste the mixture and adjust the sweetness, adding more honey or maple syrup if desired.
3. Incorporating the Apples: Once the yogurt base is ready, fold in the diced apples, ensuring they are evenly distributed throughout the mixture. This will not only add flavor but also provide texture and visual appeal to the bars.
4. Adding Granola and Nuts: Gently fold in the granola and any optional nuts at this stage. This step is crucial to maintain the crunchiness of these ingredients, so be careful not to over-mix. You want the granola to retain its texture to provide that satisfying crunch in every bite.
5. Pouring into the Baking Dish: Pour the prepared yogurt mixture into the lined baking dish, spreading it evenly with a spatula. Smooth the top to ensure even freezing. If you have leftover granola or nuts, feel free to sprinkle them on top for added texture and a decorative touch.
By following these steps, you are well on your way to creating your very own Crunchy Apple Bliss Frozen Yogurt Bars. With a blend of wholesome ingredients and a straightforward preparation process, this recipe is not only easy to follow but also incredibly rewarding. As you prepare to freeze the mixture and await its transformation into a refreshing treat, relish the anticipation of enjoying a dessert that is both healthy and delicious.
{{image_2}}
Incorporating Apples: Best Practices for Even Distribution
To achieve the perfect Crunchy Apple Bliss Frozen Yogurt Bars, evenly distributing the apples is crucial. Start by chopping the apples into small, uniform pieces. This ensures that every bite is filled with apple goodness and prevents larger chunks from sinking to the bottom during the freezing process.
To incorporate the apples effectively, fold them into the yogurt mixture gently using a spatula. This technique helps maintain the fluffiness of the yogurt while ensuring that the apple pieces are well-distributed throughout the mixture. Be careful not to overmix, as this can break down the apple pieces and affect the texture of the bars.
Layering in the Dish: Techniques for Ensuring a Smooth Top
Layering your yogurt mixture into the dish is an important step that can affect the final presentation of your frozen bars. Start by pouring half of the yogurt mixture into a prepared 9×9-inch baking dish or silicone mold. Use a spatula to spread it evenly across the bottom, ensuring it reaches all corners.
Next, gently spoon the remaining yogurt mixture on top of the first layer. To create a smooth surface, use the back of the spatula or a clean knife to carefully spread the mixture across the top. For an extra touch, you can lightly tap the dish on the counter to settle any air bubbles. Achieving a flat, even surface will not only enhance the visual appeal but also ensure uniform freezing.
Topping with Granola and Nuts: How to Achieve the Best Crunch
Adding a topping of granola and nuts not only provides a delightful crunch but also enhances the flavor profile of your frozen yogurt bars. Choose a granola mix that contains a variety of textures and flavors—look for one with oats, nuts, and perhaps a hint of sweetness. Sprinkle a generous layer of granola evenly over the yogurt mixture before placing it in the freezer.
For the nuts, consider using almonds, walnuts, or pecans, as they pair beautifully with the flavors of apples and yogurt. Chop the nuts into smaller pieces to ensure they’re distributed evenly and provide a satisfying crunch in every bite. Press down gently on the granola and nuts to secure them into the yogurt mixture. This step will prevent them from falling off when you cut the bars later.
Freezing Process: Explanation of Why Freezing Duration is Essential for Texture
The freezing duration is critical for achieving the right texture in your Crunchy Apple Bliss Frozen Yogurt Bars. Ideally, you want to freeze the bars for at least 4-6 hours, or until they are completely firm. This duration allows the yogurt to set properly without becoming too icy, resulting in a creamy and smooth texture.
If you remove the bars too soon, they may be too soft and difficult to cut. Conversely, if they freeze for too long, they can become overly hard and less enjoyable to eat. To test for doneness, gently press the top of the bars with your finger; they should feel firm yet still have a slight give.
Cutting and Serving: Tips for Achieving Clean Edges for a Professional Finish
Once your frozen yogurt bars are fully set, it’s time to cut and serve. To achieve clean edges, let the dish sit at room temperature for about 5-10 minutes before cutting. This slight thawing will make it easier to slice through the frozen mixture without crumbling or breaking apart.
Use a sharp knife and run it under hot water for a few seconds before cutting into the bars. Wiping the knife with a towel between cuts will also help maintain clean edges, giving your bars a professional appearance. For a fun serving idea, cut the bars into different shapes using cookie cutters or slice them into smaller squares for bite-sized treats.
Garnishing: Suggestions for Enhancing Visual Appeal
Presentation matters, especially when it comes to desserts. To elevate the visual appeal of your Crunchy Apple Bliss Frozen Yogurt Bars, consider garnishing them with a sprinkle of cinnamon or a drizzle of honey before serving. Fresh apple slices on top or a handful of additional granola can add a nice touch.
You can also serve the bars on a colorful platter with additional fresh fruits like berries or a side of homemade fruit compote for dipping. These simple garnishing techniques will not only make your dessert look more inviting but will also enhance the overall flavor experience.
Nutritional Information
These Crunchy Apple Bliss Frozen Yogurt Bars are not only delicious but also provide a healthy dessert option. Each bar contains approximately:
– Calories: 150
– Protein: 4g
– Sugars: 10g
This dessert fits into a balanced diet as it is lower in calories compared to traditional ice cream bars, and it incorporates nutritious ingredients like yogurt and fruit. For those who have dietary restrictions, the recipe can easily be modified. You can use dairy-free yogurt alternatives, such as coconut or almond yogurt, to create a completely dairy-free version that still retains the creamy texture and delicious flavor.
Creative Variations
Experimenting with different flavors can make your Crunchy Apple Bliss Frozen Yogurt Bars even more exciting! Here are some creative variations to consider:
– Different Fruit Options: Swap out apples for other fruits like berries, bananas, or peaches. Each fruit brings its unique flavor and texture, allowing you to customize the bars to your taste.
– Alternative Sweeteners: Adjust the sweetness to fit your dietary needs. Consider using agave syrup, maple syrup, or stevia as alternatives to traditional sugar.
– Adding Spices or Flavors: Spice up your yogurt bars with a pinch of nutmeg, ginger, or cinnamon. These spices can add warmth and complexity to the flavor, making your bars even more delightful.
Storing and Serving Suggestions
To maintain the texture and flavor of your Crunchy Apple Bliss Frozen Yogurt Bars, store any leftovers in an airtight container in the freezer. It’s best to layer parchment paper between the bars to prevent them from sticking together. Properly stored, they can last for up to two weeks.
For serving, these yogurt bars are perfect for gatherings or as a refreshing treat on a hot day. Consider offering them as part of a dessert table alongside other healthy treats or pairing them with a scoop of your favorite sorbet. They can also be enjoyed as a mid-afternoon snack or a post-meal dessert, providing a guilt-free way to satisfy your sweet tooth.
Conclusion
In summary, making Crunchy Apple Bliss Frozen Yogurt Bars is not only a simple process but also a rewarding one, allowing you to create a wholesome treat that everyone can enjoy. With the ease of preparation and the flexibility to adapt flavors and ingredients, this recipe is perfect for families or anyone looking to indulge in a healthier dessert option.
We encourage you to try this recipe and experiment with various flavors and toppings to make it your own. The joy of creating homemade frozen treats is that you can customize them to suit your preferences and dietary needs. So gather your ingredients, get creative, and enjoy the bliss of your very own frozen yogurt bars!
