Chocolate Almond Energy Bliss Balls: A Nutritious Snack for Every Lifestyle
In recent years, energy bites and bliss balls have surged in popularity within the health food community, becoming a go-to option for those seeking convenient, nutritious snacks. These bite-sized treats are celebrated for their ability to deliver a satisfying energy boost, making them ideal for busy lifestyles. Among the myriad of recipes available, Chocolate Almond Energy Bliss Balls stand out as a deliciously wholesome choice that combines rich flavors with exceptional health benefits.
Chocolate Almond Energy Bliss Balls are not just a treat for your taste buds; they represent a perfect balance of nutrition. Crafted from simple yet powerful ingredients, these bites provide a delightful way to fuel your day, whether you’re heading to the gym, tackling a long day at work, or simply looking for a healthy afternoon snack. The star ingredients, including raw almonds, Medjool dates, and unsweetened cocoa powder, not only contribute to the rich flavor profile but also pack a nutritional punch.
Understanding the Ingredients
To fully appreciate the magic of Chocolate Almond Energy Bliss Balls, it’s essential to explore the key ingredients that make them both nutritious and delicious. Each component plays a vital role in enhancing the flavor and health benefits of these energy bites.
Raw Almonds
Almonds are the foundation of this recipe and are packed with nutritional benefits. They are an excellent source of healthy fats, particularly monounsaturated fats, which are known to support heart health. Additionally, almonds provide a significant amount of protein, fiber, vitamin E, and magnesium. The healthy fats in almonds not only promote satiety but also contribute to sustained energy levels, making them an ideal ingredient for energy bites.
Medjool Dates
Medjool dates are nature’s candy, offering a natural sweetness that makes them a perfect alternative to refined sugars. These nutrient-dense fruits are high in fiber, which aids digestion and helps maintain steady energy levels. Medjool dates also contain a variety of vitamins and minerals, including potassium, magnesium, and vitamin B6, making them an excellent choice for a quick energy boost. Their sticky texture helps bind the ingredients together, ensuring that your bliss balls hold their shape.
Unsweetened Cocoa Powder
Cocoa powder is the key ingredient that imparts a rich chocolate flavor to these bliss balls without added sugars. It is loaded with antioxidants, particularly flavonoids, which are known for their anti-inflammatory properties and ability to improve heart health. Additionally, cocoa powder can enhance mood and cognitive function, making these bliss balls not only a tasty treat but also a beneficial snack for mental clarity.
Almond Butter
Adding a scoop of almond butter introduces a creamy texture and an additional source of protein and healthy fats. Almond butter complements the raw almonds, enhancing the nutty flavor while providing a smooth consistency that binds the ingredients together. It’s also rich in vitamins and minerals, including calcium and iron, contributing to the overall nutritional profile of these energy bites.
Vanilla Extract
A splash of vanilla extract enhances the flavor complexity of the bliss balls. Its aromatic qualities add warmth and depth, making each bite more enjoyable. Vanilla also possesses antioxidant properties, contributing to the health benefits of this recipe.
Sea Salt
While it may seem counterintuitive to add salt to a sweet treat, a pinch of sea salt plays a crucial role in balancing the flavors. It enhances the sweetness of the dates and cocoa, creating a more rounded flavor profile. Sea salt also contains essential minerals that can support hydration and overall health.
Shredded Coconut
For those looking to add a bit of texture and flavor, shredded coconut makes an excellent optional coating for your bliss balls. Coconut not only contributes to the chewiness and taste but also offers healthy fats and fiber, making these snacks even more satisfying.
Maple Syrup or Honey
If you prefer a touch more sweetness, a drizzle of maple syrup or honey can be added to the mixture. These natural sweeteners provide a depth of flavor while keeping the sugar content relatively low compared to traditional sweets. They are also rich in antioxidants and have various health benefits, making them a great addition to your energy bites.
Step-by-Step Preparation Guide
Creating Chocolate Almond Energy Bliss Balls is a straightforward process that requires minimal preparation. To ensure the best texture and flavor, it’s important to start with one key step: soaking the Medjool dates.
Soaking the Dates
Soaking Medjool dates is a crucial step that softens their texture, making them easier to blend into the mixture. Softened dates not only help bind the other ingredients together but also contribute to a smoother consistency in the final product. To soak the dates, simply place them in a bowl and cover them with warm water. Allow them to soak for about 10-15 minutes. After soaking, drain the excess water and pat the dates dry with a paper towel. This simple technique ensures that your Chocolate Almond Energy Bliss Balls achieve the perfect texture that is both chewy and satisfying.
Once your dates are softened and ready, you can proceed to blend them with the other ingredients to create your delicious energy bites. The following steps will guide you through the entire preparation process, ensuring that you achieve the perfect balance of flavor and nutrition.
Continue reading for a detailed guide on how to combine these wholesome ingredients into delightful Chocolate Almond Energy Bliss Balls that will keep you energized and satisfied throughout the day.
{{image_2}}
Processing the Almonds
Achieving the right texture for your Chocolate Almond Energy Bliss Balls begins with the almonds. Start by adding your raw almonds to a high-powered food processor. Pulse the almonds several times until they reach a fine meal consistency, being careful not to over-process them into almond butter. The goal is to create a crumbly yet slightly greasy texture that will help bind the ingredients together.
Monitor the consistency closely; you want to maintain some small almond pieces for a delightful crunch. If you notice the almonds turning into a paste, stop processing immediately, as this will affect the overall texture of your bliss balls. A few pulses should suffice, and you can always check by feeling the mixture between your fingers for a fine yet coarse texture.
Combining Ingredients
Once your almonds are processed, it’s time to combine all the ingredients. In the food processor, add your almond meal, cocoa powder, maple syrup, almond butter, and a pinch of sea salt. For optimal results, add these ingredients in this order to ensure thorough mixing. Pulse the mixture until all components are well combined and form a sticky consistency.
This is a crucial step—if your mixture feels too dry, consider adding a small amount of water or an additional spoonful of almond butter to help it bind together. Conversely, if it’s too wet, you can add a bit more almond meal or cocoa powder to achieve that perfect texture. Taste the mixture to see if it meets your flavor preferences before moving on to the next step.
Adjusting Sweetness
Sweetness is a highly personal preference, which is why it’s important to regularly taste your mixture as you prepare it. As you combine the ingredients, you may find that you want a bit more sweetness. If so, gradually add more maple syrup, agave nectar, or your preferred sweetener.
Keep in mind that the sweetness will intensify slightly once the bliss balls are chilled, so it’s better to err on the side of caution and add small increments. Once you reach your desired level of sweetness, it’s time to shape your bliss balls.
Shaping the Bliss Balls
Shaping your bliss balls can be both fun and satisfying. Use your hands to roll the mixture into uniform balls, about 1 inch in diameter. For consistency, you might find it helpful to use a tablespoon to scoop out portions of the mixture before rolling them into balls.
If you want to ensure uniformity and avoid a sticky mess, consider lightly wetting your hands with water before rolling. This helps prevent the mixture from sticking to your hands, making the process smoother. The end result should be a beautiful array of energy bliss balls, each packed with flavor and nutrition.
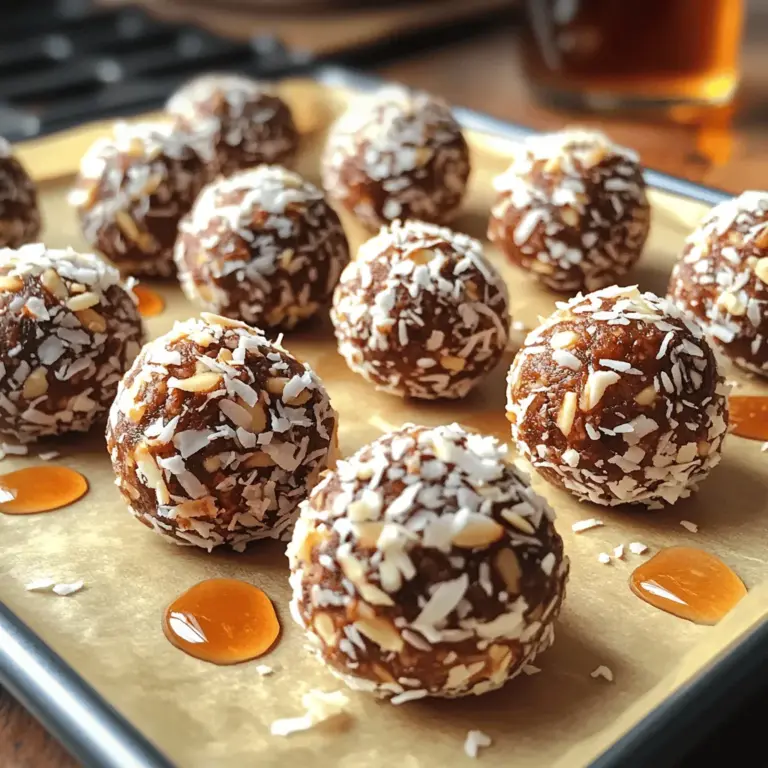
Optional Coconut Coating
For an additional layer of flavor and texture, consider rolling your bliss balls in shredded coconut. This optional step not only enhances the visual appeal but also adds a tropical twist that complements the chocolate and almond flavors beautifully.
To coat, simply pour shredded coconut onto a plate and roll each bliss ball in the coconut until fully covered. This step not only makes them look more enticing but also provides a slight chewiness that contrasts wonderfully with the creamy interior.
Chilling Process
Once your Chocolate Almond Energy Bliss Balls are shaped and optionally coated, place them on a parchment-lined tray and refrigerate for at least 30 minutes. This chilling process is crucial as it helps the balls firm up, making them easier to handle and enjoy.
While they chill, consider preparing a serving platter or container for presentation. The bliss balls can be stored in an airtight container in the refrigerator for up to a week, or you can freeze them for longer storage. Enjoying them chilled enhances their texture, creating a refreshing treat that’s perfect for any time of the day.
Serving Suggestions and Presentation Tips
Chocolate Almond Energy Bliss Balls are versatile and can be enjoyed in various settings. They make a perfect snack for busy individuals looking for a quick energy boost during the day. These bliss balls are also excellent for meal prep; simply make a batch at the beginning of the week and have them on hand for those hectic days.
For gatherings or parties, consider creative presentation ideas. Place the bliss balls on decorative plates or tiered stands for an elegant touch. You can also garnish the serving platter with fresh fruits, edible flowers, or additional shredded coconut to make it visually appealing.
These bliss balls also make fantastic gifts. Package them in clear cellophane bags tied with a ribbon, or use decorative jars to create thoughtful homemade gifts for friends and family.
Storage and Shelf Life
Proper storage is essential for keeping your Chocolate Almond Energy Bliss Balls fresh. Store them in an airtight container in the refrigerator, where they will maintain their flavor and texture for up to one week.
If you want to keep them for longer, you can freeze your bliss balls. They will last for about three months in the freezer. For convenience, consider portioning them into small bags or containers before freezing. This way, you can easily grab a single serving whenever you need a quick snack.
Variations and Customizations
One of the best aspects of Chocolate Almond Energy Bliss Balls is their versatility. Feel free to get creative and customize the recipe to suit your taste preferences.
For a twist on flavors, try adding different nut butters such as peanut or cashew butter to give your bliss balls a unique taste profile. You can also incorporate superfoods like chia seeds, hemp seeds, or flaxseeds for an added nutritional boost.
Experimenting with different add-ins can also enhance flavor and texture. Consider mixing in dried fruits such as cranberries or raisins, or spices like cinnamon or nutmeg to elevate the taste.
For those with dietary restrictions, you can adapt the recipe to be nut-free by substituting the almonds with seeds like sunflower or pumpkin seeds. There are endless possibilities, making this recipe a fantastic canvas for your culinary creativity.
Conclusion
Making Chocolate Almond Energy Bliss Balls at home is a rewarding experience that allows you to enjoy a nutritious and delicious snack. Packed with wholesome ingredients, these bliss balls provide a perfect option for those leading busy lifestyles or anyone looking to indulge in a healthy treat.
By preparing these energy balls, you not only control the ingredients but also get to explore various flavor combinations and customizations that suit your preferences. So, roll up your sleeves, try out the recipe, and celebrate the joy of healthy snacking. You may just find that these bliss balls become a staple in your kitchen!
